

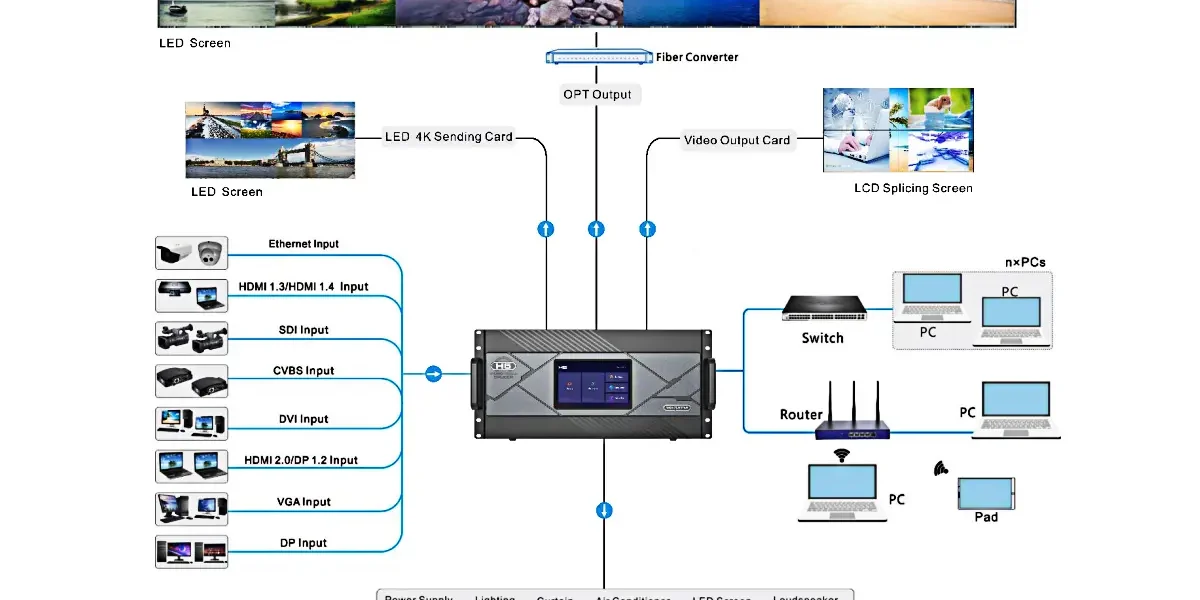
LED wall EDID tells a connected video source which input formats the receiving device advertises. It does not change the LED wall’s physical pixel count, automatically arrange cabinets, or guarantee that a picture will fill the screen. An AV integrator should treat input timing, image scaling, and cabinet mapping as three separate parts of the design.
This distinction matters before ordering a processor for a custom-sized display. A laptop might report a 1920 × 1080 display while the installed cabinets form a different pixel matrix. That can be a valid configuration, provided the source, processor, and content layout are planned together.
This guide is for AV integrators specifying a fixed indoor installation. It explains the meaning and limits of EDID, then develops a practical specification and verification process. The worked example, input-setting records, and quotation checklist help the project team agree what the finished system must display before hardware is ordered.
1. What LED Wall EDID Actually Describes
EDID stands for Extended Display Identification Data. It carries display capability information that a source can use when selecting its video output. In an LED installation, the device facing the laptop may be a processor input, a switcher, or an extender with its own EDID management. The laptop does not necessarily receive a description of the physical LED cabinet layout.
Extron’s technical explanation of EDID describes this capability exchange and the problems that can arise when the source cannot read it correctly. The practical implication is simple: record what the source is being told, then separately check what signal it actually sends. An advertised mode and a measured incoming signal are different evidence.
01. Identify the device answering the source
Draw the connection from the source outward. If a laptop feeds a room switcher, which then feeds the LED processor, identify how the switcher obtains or stores its capability information. Request the relevant configuration rather than assuming the laptop is reading the processor directly. This is especially useful when the same laptop behaves differently at two room connection points.
02. Keep capability information separate from the result
In a project record, distinguish the advertised format from the detected format. A screenshot of the computer’s display options is useful, but it is not a substitute for the processor’s input-status readout. A documented LED wall EDID configuration needs both sides of that exchange so that later troubleshooting starts with evidence.
Think of LED wall EDID as an input-format agreement. It helps establish a usable video connection, but the rest of the system still has to place that video on the correct pixels. A successful connection alone does not prove that a spreadsheet, camera feed, or presentation has the intended proportions.
2. Keep Three Pixel Dimensions Separate
A clear LED wall EDID specification distinguishes the artwork canvas, the incoming video raster, and the installed wall matrix. Write all three as width × height in pixels. A label such as “4K compatible” is too broad to describe their relationship.
- Artwork canvas: the dimensions used to create the slide, video, or media-server composition. Content may already contain borders or multiple regions.
- Input raster: the active video dimensions received at the selected processor connector. Confirm the accompanying frame rate and signal format.
- Native wall matrix: the physical pixel columns and rows supplied by the assembled cabinets. Calculate it from the exact cabinet pixel dimensions and arrangement.
01. Assign each dimension to an owner
The content designer owns the artwork dimensions, the source-system integrator owns the outgoing signal, and the display supplier confirms the cabinet matrix. One person may fill several roles, but the records should remain distinct. Ask each party to approve the same drawing before content production begins. This prevents an LED wall EDID decision from being made independently of the wall layout.
02. Confirm the processing arrangement
The processor may scale or crop the incoming raster and position it within a screen canvas, depending on its supported functions and operating mode. Cabinet mapping then determines where those image regions appear. Changing the advertised input format does not substitute for either operation.
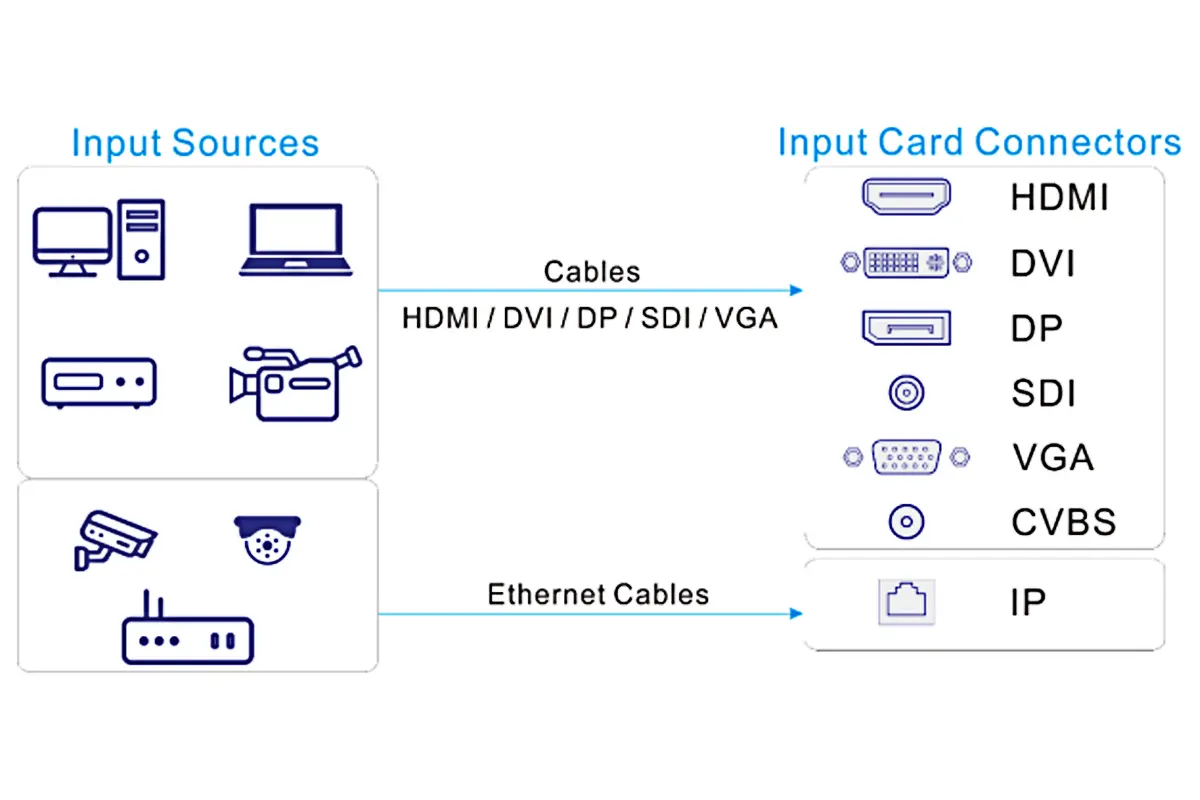
EagerLED's คู่มือความละเอียดของจอแสดงผล LED explains the distinction between physical pixels and accepted input resolution. Use it when documenting the wall matrix, then add the input-side information to the same project drawing. This keeps a controller’s headline input capability from being mistaken for the delivered screen resolution.
3. A Custom Wall and a Standard Video Signal
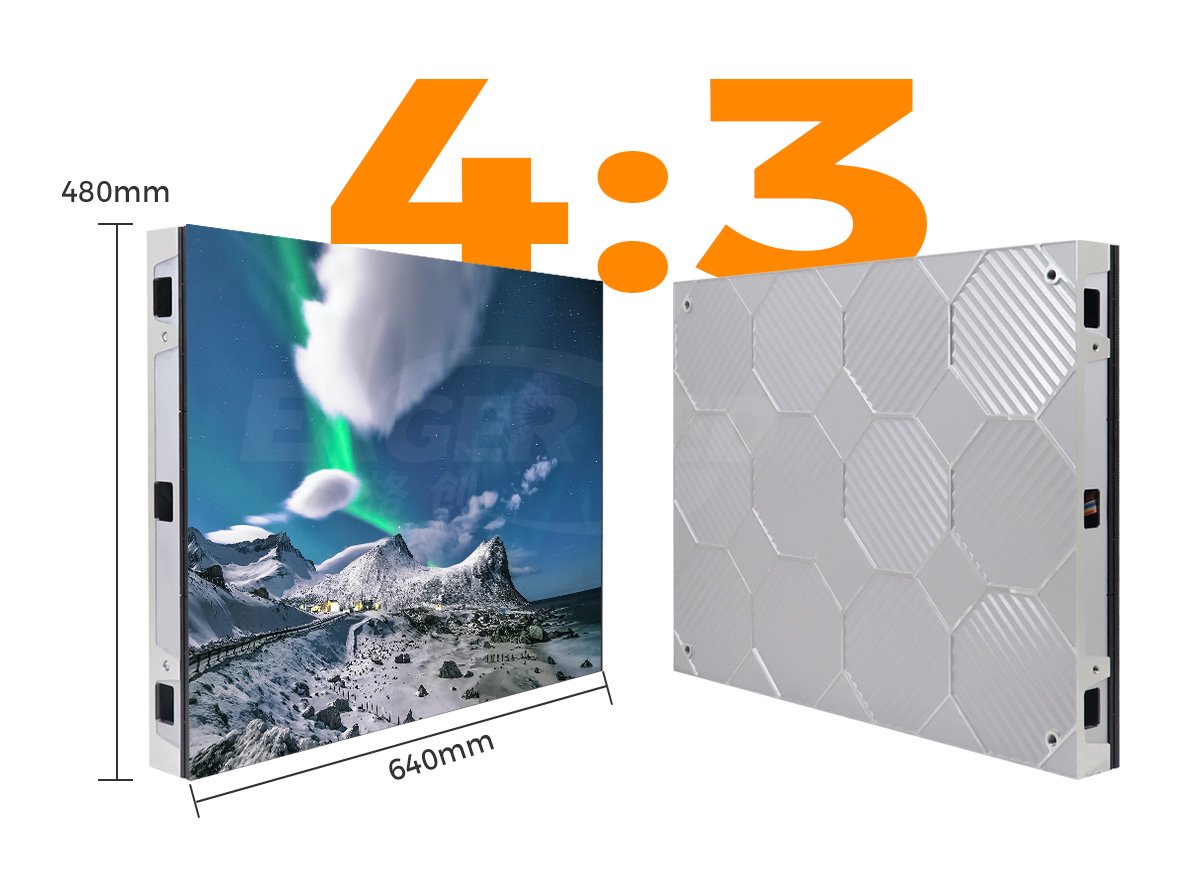
Consider a hypothetical wall with ten cabinet columns and six rows. Assume each cabinet contains exactly 192 × 192 pixels. The assembled display therefore has 1920 × 1152 pixels. These are example dimensions, not specifications for a particular EagerLED ผลิตภัณฑ์
Now suppose the agreed source signal is 1920 × 1080. The wall is taller relative to its width than that 16:9 signal. LED wall EDID cannot remove that difference in shape. The project needs an explicit image-placement decision:
- Preserve the full picture: a centered, unscaled 1920 × 1080 image leaves 72 unused pixel rows, or 36 above and 36 below.
- Fill by stretching: increasing the image height to 1152 changes vertical proportions. The height increases by approximately 6.7%, so circles and faces can look taller.
- Fill while preserving proportions: uniform scaling to 1152 pixels high produces a 2048-pixel-wide picture. A centered crop removes 64 pixels from each side of that scaled image.
These calculations describe image geometry, not a promise that any particular controller offers every option. Confirm the available scaling and cropping modes before selecting hardware. Alternatively, create content for the wall’s exact canvas and verify a supported method of transporting and mapping it.
01. Decide how the picture should occupy the wall
The choice belongs in the content brief. A border may be acceptable for presentations but undesirable for architectural graphics. Cropping may work for a background video yet remove an essential label from a data dashboard. Decide using representative content rather than a full-screen landscape photograph.
02. Test text at the intended image size
For this example, a full-width presentation can preserve its proportions by accepting the unused rows. A custom dashboard might instead use the entire 1920 × 1152 canvas, if a suitable source and processing configuration have been verified. Those are different content strategies, even though both use the same cabinets. Record the selected strategy alongside the LED wall EDID settings.
Evaluate a representative spreadsheet or dashboard with its normal application zoom and font sizes. Enlarging a low-resolution image does not add the source detail that was absent from the original. Ask the operator to read the smallest necessary labels from the planned viewing position, and agree what constitutes acceptable readability. A native pixel map alone cannot define that acceptance criterion.
4. Why Custom LED Wall EDID Has Limits
A custom LED wall EDID does not add bandwidth or processing capacity. The source, adapter, cable path, input connector, and processor must all support the requested signal. Maximum width, maximum height, frame rate, color format, and other timing requirements need to be considered together.
NovaStar’s MX30 User Manual V1.5.0 provides a useful model-specific example: its external-source EDID menu applies to HDMI1, HDMI2, and DP, with standard and custom resolution choices. The manual treats input information and screen configuration separately. That example should not be turned into a universal menu path for every controller or interface.
The H Series User Manual V1.5.0 likewise distinguishes standard, custom, and advanced EDID settings. It reserves advanced timing work for people familiar with those parameters. For a quotation, request confirmation of the exact required signal rather than inferring compatibility from a maximum pixel count.
5. Document Standard and Custom LED Wall EDID Settings
Start an LED wall EDID setup with a format the complete signal path is documented to support. Standard and custom settings describe how an input format is selected; neither label guarantees that the artwork will occupy the desired area of the wall.
01. Establish a supported standard format
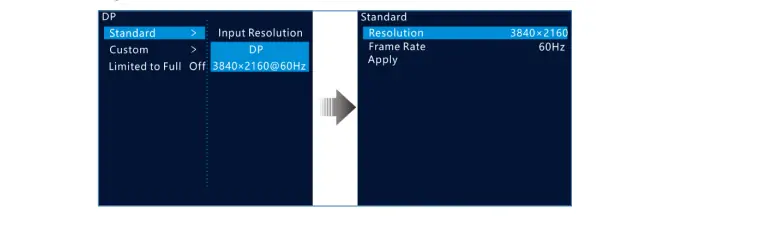
A standard preset is a useful starting point when the source equipment and processor share an accepted mode. Record the selected input connector, resolution, and frame rate. Check the detected signal after applying the selection, then evaluate scaling separately. Do not change the receiving-card configuration simply because the picture has borders.
The NovaPro UHD Jr menu illustration below shows a standard input selection. It is a model-specific reference, not evidence that the same menu or values apply to the controller in your project. Use the manual matching the installed hardware and firmware.
02. Specify a custom format only when it solves a requirement
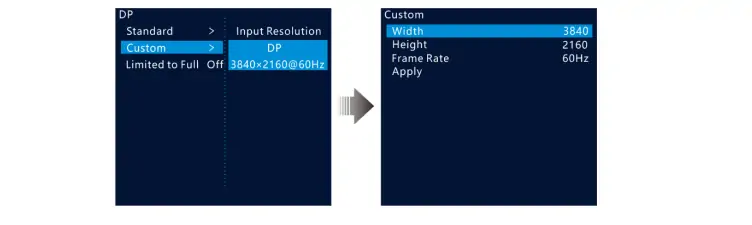
A custom input may be appropriate when the content workflow needs a particular raster and every device in the path supports it. Write the required width, height, and frame rate before selecting a controller. Ask the supplier to verify the complete timing, rather than treating the two active-image dimensions as sufficient proof of compatibility.
The second menu reference shows separate width, height, and frame-rate fields. A custom LED wall EDID setting belongs in the project documentation together with the source model and any adapter. If one component cannot produce or accept the required timing, agree on a supported transport format and an explicit image-placement method.
03. Keep a record that another technician can reproduce
Before changing LED wall EDID, record the working settings and the agreed method for restoring them. Make changes during an appropriate test window, with the responsible operator present. Change one variable at a time and compare the resulting input status; changing timing, scaling, and mapping together makes the cause of a result harder to identify.
| บันทึก | สิ่งที่ต้องบันทึก | Why it helps later |
|---|---|---|
| Source and connection | Computer or player model, output port, dock or adapter | Distinguishes a processor issue from a changed source path |
| Advertised input mode | Selected standard preset or approved custom timing | Shows what the receiving device was configured to advertise |
| Detected incoming video | Actual width, height, frame rate, and available format information | Confirms the source sent the intended signal |
| การจัดวางภาพ | Scaling mode, crop, layer size, position, and screen canvas | Explains how that signal occupied the installed matrix |
| ข้อมูลอ้างอิงการกู้คืน | Dated settings record and responsible technician | Provides an agreed starting point after an unsuccessful change |
6. What to Verify in a Demonstration
Ask the supplier to demonstrate the complete proposed signal path with your normal source device and representative content. A useful LED wall EDID demonstration records the selected input, its advertised format, the detected incoming signal, the image-placement settings, and the wall’s native matrix.
01. Test the complete source path
Include the actual docking station, adapter, extender, or switcher if the finished room will use one. A direct laptop-to-processor test is useful for comparison, but it does not validate the equipment inserted between them. Extron documents EDID management in switching and distribution systems; the upstream source can be influenced by how those intermediate devices handle capability information.
02. Use content that exposes image-placement errors
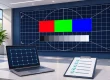
Use a labeled border, circles, small text, and numbered regions in the test content. These make missing edges, distorted proportions, and misplaced areas easier to identify. Agree which content should fill the wall and which should retain its original aspect ratio. Keep a photograph and LED wall EDID record with the accepted source settings for each case.
03. Repeat the operating situations the room will encounter
Include normal source changes in the acceptance demonstration. For example, disconnect and reconnect a guest laptop, select another approved source, and return to the original input. Where shutdown and startup are part of normal operation, test the agreed sequence as well. Record whether the accepted LED wall EDID and image-placement configuration produces the same intended result each time.
Define the expected behavior before testing. Does the room need a fixed presentation layout for every guest device, or will an operator select a source-specific preset? Which borders or crops are acceptable? A successful picture after a technician manually adjusts several settings does not, by itself, demonstrate the everyday workflow that the customer expects.
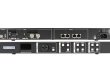
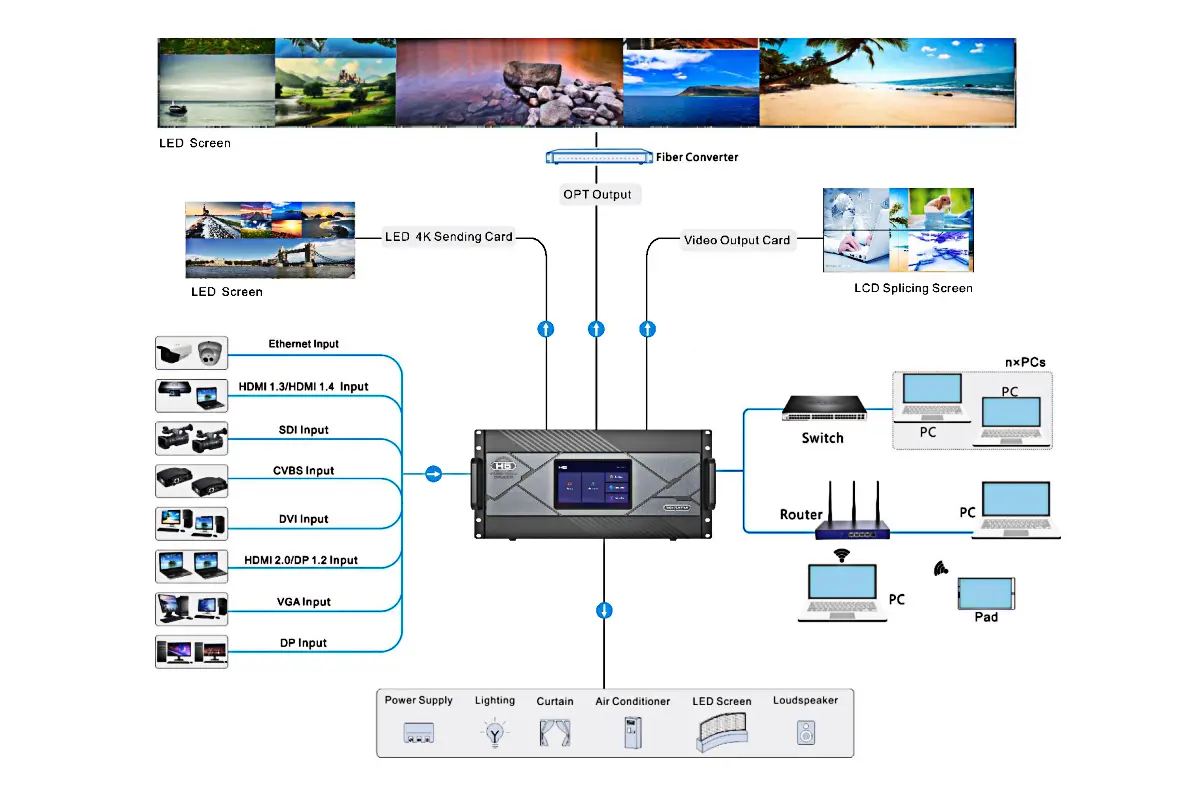
For hardware background, see the H5 processor overview. Consult the matching manual for the supplied hardware and software revision; an illustration of a connector family does not establish the capabilities of an installed card.
7. Match the Symptom to the Right Question
LED wall EDID is one possible part of an image problem. The table below is a discussion aid for a demonstration or support call, not a diagnosis from appearance alone. It helps collect evidence before anyone changes a working cabinet configuration.
| การสังเกต | หลักฐานที่ต้องรวบรวม | คำถามที่ต้องแก้ไข |
|---|---|---|
| The required source mode is unavailable | Advertised EDID, source output options, adapter identity | Does the full input path support and advertise the required timing? |
| The processor detects video but edges are missing | Input dimensions, crop values, layer position, test border | Where is the picture being cropped or placed outside the visible canvas? |
| The picture has borders | Original artwork, active image area, aspect-ratio settings | Are the borders in the content or introduced by image placement? |
| Individual cabinet regions repeat or appear out of order | Numbered test pattern and actual connection map | Does the screen mapping match the installed arrangement? |
| Only one source or adapter combination fails | Working and failing signal formats with the same processor input | Which part of that source path changes compatibility? |
8. Put EDID Requirements into the Control-System Quote
A quotation should connect the requested LED wall EDID behavior to named hardware, supported inputs, and an acceptance deliverable. Avoid approving a system solely because its maximum input resolution exceeds the wall’s pixel count. The proposed configuration must support the actual source path and the chosen content workflow.
Send the supplier a brief that identifies mandatory requirements and acceptable alternatives. For example, “show the complete presentation without distortion” leaves room for a supported format with borders. “Fill every physical pixel with a custom dashboard” requires a different demonstration. Writing that distinction down allows proposals to be compared on their actual behavior.
| ส่งมอบ | การตอบสนองของซัพพลายเออร์ต่อคำขอ | คำถามการยอมรับ |
|---|---|---|
| ตารางฮาร์ดแวร์ | Exact processor, input cards, and intermediate equipment | Does the quote identify the configuration that will be demonstrated? |
| Supported source schedule | Approved formats for each named source and connection path | Are guest devices and installed players covered separately? |
| Content layout drawing | Wall matrix, image regions, borders, and any permitted crop | Will essential text and graphics remain visible? |
| แผนการยอมรับ | Representative files, test situations, and expected outcomes | Can the customer witness the required behavior before sign-off? |
| แพ็คเกจส่งมอบ | Configuration records, applicable manuals, and recovery contacts | Can the operator identify the accepted setup after installation? |
Ask the supplier to identify exclusions as well. A demonstration with one computer does not establish compatibility with every future laptop or adapter. If the room supports unrestricted guest devices, define the connection policy and escalation process. The LED wall EDID record should make those boundaries understandable to the person who operates the room.
9. คำถามที่พบบ่อย
Does a 60 Hz EDID setting mean the LED modules refresh at 60 Hz?
No. Input frame timing and the LED module’s drive refresh specification describe different operations. Record both separately. A high module refresh figure does not prove that the source is delivering a higher video frame rate.
Does EDID replace the receiving-card configuration file?
No. The receiving-card file concerns the cabinet or module configuration, whereas EDID concerns information presented to a video source. Keep each record with its intended hardware. EagerLED's RCFG and RCFGX explanation describes the receiving-card side and its compatibility checks.
Can the same screen use different input formats for different sources?
Potentially, if the controller and the rest of the signal path support the proposed formats. Document the accepted combinations and image-placement settings for each source. Do not assume that a successful laptop test also validates a camera, playback appliance, or conference-room dock.
Should we buy a separate EDID emulator immediately?
First establish the actual problem and the capabilities already present in the processor, switcher, or extender. An emulator addresses capability communication; it does not create missing scaling functions, repair cabinet mapping, or expand an input’s supported bandwidth.
Should the main and backup signal paths use the same advertised format?
Where the design expects the same source to feed either path, ask the integrator to establish compatible advertised and detected formats for both. Test the actual changeover procedure with representative content. Matching EDID information alone does not prove that switching will be uninterrupted or that image-placement settings match.
Must every source be forced to use the wall’s native resolution?
No. A supported standard input can be mapped to a differently shaped wall with an agreed placement method. A custom native-sized input is an option only when the source and processing path support it. Select the method that meets the content requirements and can be operated reliably by the intended users.
10. Specify the Complete Signal Path
Before approving the system, put the wall matrix, source list, required input formats, intermediate equipment, and intended image placement on one brief. Include examples of the smallest text and the content that must remain uncropped. Ask for the supported configuration and acceptance demonstration to be included with the proposal.
For help matching LED wall EDID requirements to a display project, ติดต่อ Sun Legal EagerLED with your pixel map and source-equipment list. State whether standard video formats are acceptable or whether the application needs a verified custom input format.