

Knowing how to clean LED screen panels after an event starts with identifying the panel surface and its approved cleaning method. Shut down and isolate the equipment, inspect for damage or moisture, and remove contamination using the tools specified for that model. Use liquid only when the manufacturer expressly permits it. Complete the required drying, inspection, and functional checks before returning panels to the rental inventory.
For an AV rental team, the job continues beyond a clean display face. A panel that looks ready can still have a damaged corner, contaminated connector, or unresolved image fault. This guide connects cleaning with the return-to-warehouse process, so the next crew receives equipment with a clear condition record.
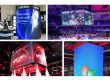
The workflow below is a planning guide for trained rental technicians. The installed product’s instructions determine the actual cleaning materials, power-isolation procedure, handling method, and release criteria. Product images show cabinet features and applications; they do not demonstrate an approved cleaning procedure.

1. Sort Panels Before Cleaning
Start by separating routine dust removal from work that requires technical assessment. Asking how to clean LED screen panels is useful only after confirming that the equipment is suitable for routine cleaning. A drink spill, damaged connector, or suspected internal moisture changes the next action.
Create three clearly identified groups: routine cleaning, further assessment, and ready for final inspection. Record the cabinet identification and the reason for any hold. Do not place adhesive labels on the LED face; use the equipment’s designated identification area or a separate job record.
01. Capture the event history
Ask the returning crew about rain, condensation, drinks, dust, confetti, stage effects, and impacts during teardown. Record observed exposure without guessing what happened inside the cabinet. If a fault appeared during the show, retain the original photograph and its cabinet position before the wall is dismantled.
A useful intake note is specific: “Lower-left cabinet received a splash near the rear connector.” “Needs cleaning” loses the information that determines whether the unit should remain isolated. Include accessories and transport cases in the return inspection because they can carry contamination into the next deployment.
02. Identify the surface and configuration
Exposed SMD packages, GOB coatings, and COB surfaces need model-specific instructions. Neither a smooth face nor a protective coating establishes compatibility with a household cleaner. Confirm the actual module configuration, including any replacement modules fitted during previous service.
For example, the EA500C6 rental LED display has multiple indoor and outdoor configurations. Its published specifications identify GOB for selected indoor pitches. Record the supplied version instead of assigning one cleaning instruction to every cabinet carrying the family name.

2. Prepare the Right Cleaning Kit
Build the kit around the equipment manual. A product advertised as an “LED screen cleaner” does not establish approval for your video wall. When training staff on how to clean LED screen panels, identify permitted materials by name and intended surface, rather than leaving the choice to whoever starts the job.
| Item | Approval or preparation needed | Reason to leave it out |
|---|---|---|
| Soft brush | Suitable bristles and ESD characteristics for the specified module | Stiff bristles, embedded grit, or an unknown previous use |
| Lint-free cloth | Manufacturer permits contact with that surface; cloth is clean | Fibers snag on exposed packages or the cloth contains particles |
| Compressed-air equipment | Explicit approval, filtration, and specified operating conditions | Oil, condensation, unapproved pressure, or an aerosol substitute |
| Cleaning liquid | Exact product, dilution, application method, and drying instructions | Generic “screen-safe” labeling without module approval |
| Panel support | Stable, compatible fixture that protects the face and edges | Improvised support that loads the LEDs or lets the cabinet shift |
| Inspection record | Cabinet identity, findings, actions, and release status | A single check mark that combines cleaning with functional approval |
Keep supplies for the LED face separate from supplies used on cases, wheels, handles, and external frames. A clean-looking cloth used on a flight case may carry hard particles. Replace or clean reusable tools according to their instructions, and store them where workshop dust cannot settle on them.
Some direct-view LED manuals prohibit liquids entirely; others specify particular surface-cleaning methods. Compressed air also requires care: certain manuals permit filtered air while explicitly excluding canned air. Do not transfer an instruction from a different display family or substitute equipment because it appears similar.
3. How to Clean LED Screen Panels After an Event
Use a defined work area with adequate lighting, approved handling supports, and a clear route for moving cabinets. The following sequence explains how to clean LED screen panels as part of a controlled return process. It does not authorize opening electrical compartments or removing modules.
01. Shut down and isolate the equipment
Follow the normal shutdown sequence, then have trained personnel complete the required electrical isolation. A black test image, standby command, or disconnected signal cable does not establish isolation. Account for the actual power arrangement and observe the manufacturer’s waiting or discharge instructions.
Let the equipment reach the conditions specified for cleaning. Arrange stable access before work begins. Do not reach across an unsupported cabinet, lean on its display face, or treat the assembled wall as a work platform.
02. Inspect before touching the face
Look for loose masks, damaged packages, surface lifting, lodged debris, and abnormal gaps. Use suitable lighting to locate contamination without pressing on the face. Photograph anything that may require a service decision, especially damage around the cabinet perimeter.
If a cloth could catch a raised component, stop before making contact. Cleaning cannot secure a loose mask or restore a broken LED package. Route the cabinet to the relevant repair process and keep its identity connected to the finding.
03. Remove loose particles with the approved method
Use the specified brush, lint-free material, or approved air system. Work systematically so debris does not repeatedly settle on areas already cleaned. Keep the applied force within the manufacturer’s instructions and stop if a tool catches or the surface moves.
The practical test of how to clean LED screen panels well is whether contamination is removed without changing the surface. If a mark remains, identify it before choosing another method. Repeated passes with greater pressure are not a substitute for diagnosis.
04. Address remaining marks only within the instructions
Where cloth contact is permitted, use a clean section of the specified cloth and the prescribed motion. Avoid pulling material across vulnerable edges. Do not force cloth into module gaps or around exposed packages to reach a stubborn particle.
If the manual authorizes damp cleaning, follow the exact cleaner and application instructions. For a cloth-applied method, moisten the cloth as directed rather than spraying the cabinet. Keep liquid out of seams and connectors. If no approved method covers the remaining residue, request guidance and leave the affected panel on hold.
05. Inspect accessible external cabinet areas
Check the condition of handles, locks, corner protection, accessible ventilation openings, and external connectors. Cleaning the display face does not complete these checks. Use the separate procedure for each area, and avoid moving debris into the electronics enclosure.
The front-service LED module maintenance guide explains the distinction between surface care and component service. A removable module or opening rear cover provides access; it does not make internal cleaning a routine task for untrained staff.

4. Handle Event Residue and Weather Exposure
Learning how to clean LED screen panels between shows includes recognizing when ordinary dust removal is insufficient. Treat the following situations as different intake conditions, rather than applying one stronger cleaner to all of them.
01. Confetti, dust, and loose particles
Inspect the face, accessible vents, and packing materials. Remove loose debris only with the approved tools. Do not scrape embedded particles with a blade, fingernail, or improvised pick. If debris has entered a connector or enclosure, assign the next step to a technician rather than pushing it farther inside.
Metallic-looking confetti warrants identification and careful inspection around electrical connections. Appearance alone cannot establish whether a material is conductive. Record what was used at the event when that information is available.
02. Sticky film, fingerprints, and adhesive
Ask about stage effects and handling, but do not identify an unknown film solely by appearance. Share the effect-fluid information, photographs, and panel model with support when requesting a removal method. A cleaning solvent suitable for a metal frame may be unsuitable for a module coating.
Keep tape and equipment labels away from the active face. If adhesive is already present there, avoid experimenting with citrus cleaner, alcohol, or adhesive remover. Knowing how to clean LED screen panels also means recognizing when a proposed chemical has not been approved.
03. Rain, spills, and possible condensation
A dry-looking front does not prove that connectors or internal components are dry. Keep equipment with suspected ingress isolated for assessment. Identify the exposure, affected cabinets, and any damaged sealing features. Do not energize a suspect panel simply to see whether it still works.
Outdoor suitability and cleaning permission are separate questions. Check the exact front and rear protection, assembly condition, and manufacturer procedure. Do not infer permission to hose or pressure-wash a rental cabinet from an IP rating. Never invent a universal drying time or use a heater to accelerate recovery without an approved procedure.
5. Check, Test, and Pack the Panels
A useful procedure for how to clean LED screen panels ends with a release decision. Keep physical inspection, permitted functional testing, and packing as separate sign-offs. This makes an unresolved issue visible even when the surface-cleaning task has been completed.
| Check | Evidence to record | Hold condition |
|---|---|---|
| Display face | Cleaned using the approved method; observed condition recorded | Remaining unknown residue, loose mask, or damaged LED package |
| Moisture assessment | Required drying and assessment completed | Suspected ingress or an unresolved drying requirement |
| Mechanical hardware | Handles, locks, and protection checked as specified | Damage or insecure hardware affecting handling or assembly |
| Electrical condition | Required inspection completed by responsible personnel | Damaged contacts, heat marks, corrosion, or unexplained tripping |
| Image test | Panel identification, test conditions, and observed results | Unresolved pixels, lines, instability, or visible mismatch |
| Transport case | Correct layout, clean supports, dry interior, and equipment count | Contaminated lining, damaged dividers, or pressure on the face |
01. Test only after the equipment is cleared for power
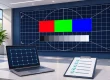
When the necessary inspections are complete, use the supported test procedure. Include appropriate solid-color and gray patterns and representative content. Compare results with the recorded pre-cleaning condition where available. Keep settings consistent enough for the comparison to be meaningful.
A panel that lights up may still have a color mismatch or intermittent fault. Record the extent of the test rather than claiming the entire inventory passed because a sample was checked. If a fault remains, follow diagnosis; do not keep wiping the affected area.
02. Protect edges during transfer
Use the supplied handling points and the approved packing orientation. Check that protection features are correctly positioned for the next handling step. Avoid placing the LED face against a bench, loose cable, or another cabinet.

Clean panels should enter clean, suitable cases. Inspect the supports and dividers before loading, and keep loose accessories out of spaces where they could contact the display surface. Follow the specified storage conditions for the actual equipment; adding desiccant does not resolve a suspected water-ingress incident.
6. Make Cleaning Repeatable Across the Crew
Document how to clean LED screen panels for each equipment family in a short task sheet linked to the current manual. Include photographs of the correct tools, the permitted cleaning surfaces, stop conditions, and the person responsible for technical questions. Update the sheet when the approved method or module configuration changes.
A practical handover record contains the event reference, cabinet identity, contamination observed, approved method used, technician, unresolved findings, and release decision. Keep cleaning completion separate from availability in the booking system. Equipment awaiting assessment should not quietly reappear in the next dispatch list.
Consider a hypothetical return of several cases from a conference. Most cabinets have light surface dust, one has an unfamiliar sticky mark, and another has a bent connector housing. The crew can complete approved dust removal on the unaffected cabinets while the two exceptions receive separate records. The sticky mark needs a suitable cleaning decision; the damaged connector needs technical assessment. Neither should be hidden inside a general note saying that the entire return was cleaned.
At the next shift change, the receiving technician should be able to identify those two cabinets without relying on a conversation with the previous crew. Record where they are stored, what has already been attempted, which instructions were followed, and what decision is still needed. When the issue is resolved, attach the resulting inspection or test record to the same equipment identity.
This example is a proposed workflow, not a reported project. Adapt it to the company’s inventory system and service responsibilities. The aim is to prevent a completed cleaning task from being mistaken for approval to dispatch equipment with an unresolved defect.

Set inspection triggers around actual use. A return from an indoor conference and a return from an outdoor production may require different assessments. Inspect after each return, then clean when condition and manufacturer guidance call for it. Unnecessary repeated contact with the face is not a maintenance target.
Use recurring findings to improve the next event plan. If multiple cabinets arrive with similar edge damage, review handling and packing. If an unidentified film keeps appearing, investigate exposure and obtain an approved removal method. Teaching how to clean LED screen panels is more effective when the crew can connect each instruction to a real intake finding.
7. Frequently Asked Questions
01. Can one cleaning kit serve several rental screen brands or models?
Only where the approved instructions overlap. Keep incompatible liquids and surface tools separate, and label the kit by equipment family. Similar pixel pitch, cabinet size, or appearance does not establish that the same materials are suitable.
02. Should replacement modules be removed for cleaning after every event?
No universal removal routine is appropriate. Follow the equipment’s maintenance instructions and the findings from inspection. Unnecessary removal adds handling and connection work; accessible surface cleaning does not automatically require disassembly.
03. What should a rental company charge for unusually dirty returns?
Use the agreed rental terms and documented work. Record the incoming condition, approved cleaning or assessment required, labor, and any confirmed parts replacement. Establish charges and responsibilities in advance rather than treating every visible mark as damage.
04. What if the next event starts before a suspect panel is cleared?
Keep the panel unavailable and use verified compatible stock where the system permits. A dispatch deadline does not resolve an outstanding moisture or electrical assessment. Record substitutions and confirm configuration and image matching before deployment.
05. What should I send support when an approved method leaves a mark?
Provide the cabinet and module identification, close-up and wider photographs, known exposure, exact cleaning materials already used, and the observed result. Explain whether the mark is visible with the display off, during normal operation, or both. Do not power suspect wet equipment to obtain another image.
8. Prepare Your Next Rental Equipment Purchase
Before expanding your fleet, ask the supplier to demonstrate how to clean LED screen panels on the proposed configuration and provide the written instructions. Include handling protection, service access, compatible spare parts, and case layout in the equipment discussion.
Compare EagerLED’s rental-grade LED display systems for your event applications. Send the planned screen size, indoor or outdoor use, transport frequency, and maintenance arrangements when you contact EagerLED for an equipment recommendation. Request cleaning and storage requirements for the exact model alongside the purchase quotation.