

A square column LED display gives an event audience four viewing faces around one footprint. For an AV rental company, the buying decision starts with more than pixel pitch: the cabinets must form repeatable corners, the content must work from several directions, and technicians must reach serviceable parts after the column is closed.
Start with a floor plan, audience distances, sample artwork, and a proposed assembly method. Then request a complete four-face configuration from the supplier. This makes it possible to compare the display, support system, processing, cables, transport cases, and spare parts as one working rental package.
1. Define What Your Square Column LED Display Must Do
At a trade show, a square column LED display may repeat a sponsor message toward four aisles. At a product launch, it may carry coordinated motion around its perimeter. At a conference, individual faces may show directions, session information, and branding. These are different content jobs, even when the outside dimensions match.
Mark the approach routes and places where people actually stop. Record the nearest useful viewing position, typical viewing distance, and whether any face is partly hidden by furniture or a stage. A face beside a queue may need readable text; another facing an open hall may mainly carry animation. Design around the most demanding required message.
Also distinguish a freestanding event structure from a display wrapped around an existing building column. A wrap has a fixed obstruction inside, which changes cable routing, ventilation, and service access. An event tower needs its own approved support arrangement. Neither should be assumed structurally supported by the LED cabinets alone.
Describe the setup window in operational terms. Note how equipment enters the venue, where cases can be stored, and which parts of the build require access equipment or specialist crew. A column positioned in an island booth may have no convenient hidden side for cables. Resolving that route on the floor plan helps prevent a last-minute change to the display position or audience circulation.
For a rental fleet, list the other layouts the same inventory should serve: straight walls, corners, short towers, or scenic pieces. Reuse can make the purchase more useful, but only if the supplier confirms the relevant mechanical and electronic combinations. The broader EagerLED rental LED display range is a starting point for that discussion.

2. Check the Corner Assembly Before Selecting Cabinets
A square column LED display needs four repeatable right-angle joints. Ask for a top-view drawing that identifies the corner cabinets, standard cabinets, locks, reinforcement, and cable path. An attractive rendering cannot show whether the last face can be installed or whether the finished corner is serviceable.
01. Separate beveled corners from curved-wall locks
A curved-wall lock allows a specified angle between neighboring cabinets. That does not automatically make it suitable for a ninety-degree corner. A square assembly may instead use beveled cabinet edges, dedicated corner components, or another approved arrangement. Request the exact option in the quotation, rather than accepting “supports creative shapes” as a specification.
EagerLED’s EA500H8V right-angle rental LED screen can also be configured as a square column LED display for exhibitions, stages, and event branding. Its 500 × 500 mm (19.7 × 19.7 in) cabinets have 45-degree beveled edges that allow adjacent faces to meet at 90-degree corners. Arranging four faces around a square perimeter creates a column-shaped display, with the cabinet grid defining each face’s width and height. Request a project-specific layout covering all four corners, structural support, content mapping, and maintenance access. The arc locks used for curved walls serve a separate purpose.

02. Inspect the joint from normal viewing positions
Request close views of a lit corner from straight ahead and from both diagonals. Use a grid, a solid background, and moving artwork. Look for a dark strip, uneven alignment, exposed edges, and an abrupt visual break. Agree on acceptable appearance using the intended viewing positions and content, not an unsupported promise of an invisible seam.
Have a technician demonstrate closure of the fourth face and removal of a corner-adjacent module. This reveals access restrictions before they become a problem during event setup. Ask how exposed corners are protected during packing, since a cabinet that works well in a flat wall may need different protection in a touring corner kit.
3. Choose Transparent or Solid Panels for the Actual Content
Choose the surface of a square column LED display after reviewing the artwork and venue background. A transparent system can keep scenic elements visible through the structure. A solid display face may better suit dense graphics when the surrounding structure should be concealed. Neither choice removes the need for a sample viewed under representative lighting.
| Requirement | Transparent approach | Solid approach |
|---|---|---|
| Background visibility | Use openness as part of the scenic design; check what remains visible behind it. | Use an opaque image surface when the structure should be visually concealed. |
| Text and fine graphics | Test the actual text against the expected background and lighting. | Compare candidate pitches using the same artwork and viewing distance. |
| Internal components | Plan visible cable and support placement deliberately. | Check access and ventilation even when the interior is hidden. |
| Outdoor use | Verify the selected configuration and complete installation conditions. | Verify the selected configuration and complete installation conditions. |
The EA1000TOR1 transparent rental system uses 1000 × 500 mm (39.4 × 19.7 in) standard cabinets, with compatible 500 × 500 mm (19.7 × 19.7 in) angled cabinet options described for square assemblies. Request a bill of materials for the particular layout. Do not assume compatibility with a different product family.
For a solid-faced column, EA500H8V is another option to discuss with EagerLED. Choose between this approach and a transparent column according to the desired appearance, background visibility, and content requirements. Confirm the selected indoor or outdoor version and its specifications for the event.
Pixel pitch should follow the smallest required detail. Supply a real sponsor logo, schedule panel, or product label and ask to view it on the proposed screen. A convenient distance rule cannot establish whether that particular artwork is readable. EagerLED’s LED display resolution guide provides related planning context.
For a square column LED display appearing on camera, test with the intended camera settings, brightness, and dimming level. Refresh rate alone does not guarantee a clean recording. A demonstration should include moving imagery, dark gradients, skin tones when relevant, and the actual frame rates used by the production team.
4. Calculate Cabinet Quantity and Native Resolution Separately
A square column LED display quotation should distinguish visible area, installed cabinet quantity, and spare inventory. Begin with a face-by-face elevation. Check whether the corner construction changes the usable face width, and whether any top, base, access opening, or decorative trim sits outside the active display area.
The following is an illustrative calculation, not an EagerLED model specification. Assume four identical active faces, each 1 m wide × 3 m high (3.28 × 9.84 ft), built from nominal 500 × 500 mm cabinets. Assume the approved corner arrangement allows that grid on each face.
| Item | Calculation | Result |
|---|---|---|
| Cabinets per face | Two across × six high | 12 cabinets |
| Installed display cabinets | Four faces × twelve | 48 cabinets, excluding spares |
| Active area | Four × 1 m × 3 m | 12 m², approximately 129.2 sq ft |
| Pixels per face at hypothetical exact 2.5 mm pitch | 1000 ÷ 2.5 wide; 3000 ÷ 2.5 high | 400 × 1200 pixels |
| Unwrapped four-face canvas | Four × 400 pixels wide | 1600 × 1200 pixels |
| Total active pixel count | 1600 × 1200 | 1,920,000 pixels |
The square column LED display in this example has no illuminated top or bottom. The calculation does not establish its finished external footprint, structural suitability, or compatibility with any named cabinet. Those details require the supplier’s approved drawings. Corner-specific parts must be identified within the installed quantity or listed separately, without double counting.
Use the actual module and cabinet pixel counts for the final content template. Rounded pitch names can produce inaccurate calculations, and some transparent designs have different horizontal and vertical pixel spacing. Likewise, a processor’s total pixel capacity is only one check: verify output-port loads, mapping limits, supported signal settings, and the proposed data distribution.
5. Map Four Faces Before Producing the Animation
A square column LED display can repeat one message, show four independent messages, or distribute one panoramic composition around its perimeter. Decide which behavior is needed before the content team starts. A panoramic file that looks balanced on a computer may place its most useful text directly across a physical corner.
Assign clear face labels, such as A through D in clockwise order when viewed from above. Mark the front reference, pixel origin, orientation, cable entry, and output assignment on the same drawing. Use a test image with face names, arrows, and numbered corners. This exposes mirrored images and reversed face order more reliably than a decorative video loop.
For repeated messages, keep each face readable on its own. For continuous animation, review where objects cross a corner and where the composition wraps from the last face back to the first. People usually see one face or two adjacent faces at once; essential information should not depend on seeing all four simultaneously.
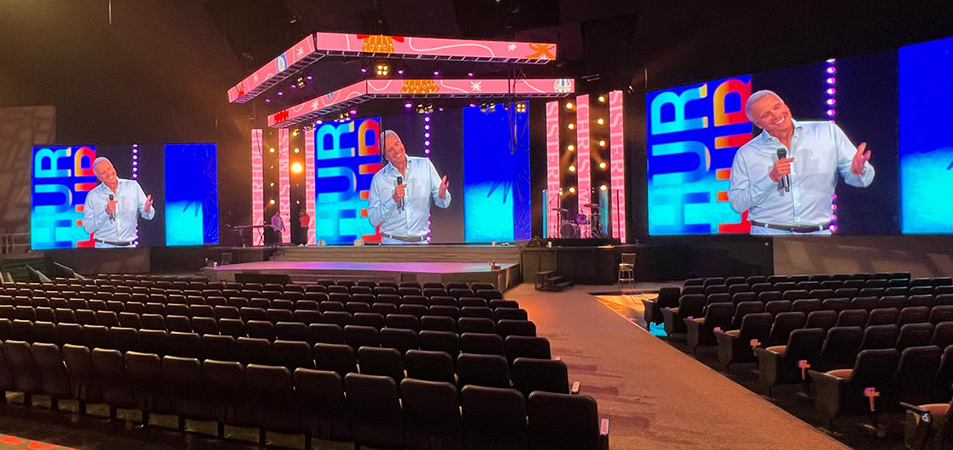
Give the designer a native-resolution template for the square column LED display, with each face boundary marked. Include practical clear zones for text and logos based on the approved corner appearance. Avoid claiming a universal safe-margin size: it depends on the joint, artwork, and viewing angle.
Save the processor configuration, media-server project where applicable, test patterns, and final playback files together. Label their versions against the approved cabinet layout. If the rental crew changes the height or face width for another event, both the map and artwork need checking; renaming an old project is not enough.
6. Plan Support, Power, Access, and Transport Together
The installation plan for a square column LED display must account for the closed geometry. A rear-service component that is easy to reach on a straight wall can become inaccessible inside a narrow tower. Confirm the service method for modules, receiving cards, power supplies, and connectors individually.

01. Keep the support design separate from the image layout
Specify whether the structure is ground supported, suspended, or attached to an approved frame. Obtain the appropriate structural design and venue approval for its location and dimensions. Total mass includes cabinets, cables, frames, processors where mounted, and any decorative elements. Floor conditions, crowd interaction, and outdoor wind exposure belong in that assessment.
Do not extrapolate a suspended flat-wall example into approval for a freestanding tower. The attachment points, load paths, allowable heights, and support requirements can differ. The responsible engineer or qualified installation provider should establish the permitted arrangement and operating limits for the actual event.
02. Draw the power and service routes
For each square column LED display, obtain maximum input requirements and the permitted power-linking arrangement for the selected cabinets. Have a qualified electrician size distribution and protection for the supply conditions. Average consumption during a sample video is not a substitute for circuit design information.
Draw cable entry, strain relief, connector access, and ventilation paths before closing the fourth face. Do not let decorative covers obstruct cooling or service access. For outdoor events, confirm how the whole installation handles weather exposure, including openings, cable connections, and power distribution; an individual cabinet rating does not describe the entire structure.
03. Make the packing plan match the assembly sequence
Label cabinets, special corner parts, cases, and cables to match the drawing. Pack items so the crew can build in sequence without exposing unnecessary panels. Agree on spare modules, power supplies, receiving cards, and essential cables using the operating schedule and service plan. Keep spare counts separate from the installed screen quantity.
7. Compare Complete Quotes and Witness a Full Assembly
Evaluate a square column LED display as a complete working package. A low panel price can exclude the corner options, support hardware, processing, or cases needed to deploy it. Ask each supplier to price the same scope and identify exclusions clearly.
| Package item | Written scope | Acceptance evidence |
|---|---|---|
| Display and corners | Exact versions, quantities, dimensions, and approved joints | Completed four-face assembly and close corner views |
| Control system | Processor, receiving configuration, cable map, and backups | Correct face order, orientation, and synchronized playback |
| Service and spares | Component access method and itemized spare inventory | Demonstrated replacement without unnecessary dismantling |
| Support and logistics | Included hardware, engineering responsibilities, cases, and labels | Assembly documents and checked packing list |
| Commercial support | Warranty scope, support contact, and replacement process | Written terms and agreed handover documents |
During acceptance, run the content that matters to your customer: text, logos, motion, and camera shots where required. Check brightness consistency across faces and inspect the corners from the planned positions. Agree on operating conditions, test duration, and defect acceptance criteria in advance so both parties assess the same result.
Ask the crew to demonstrate startup, configuration recovery, shutdown, and a representative component replacement. Record the final configuration and handover files with the packing list. An acceptance video is useful, but it should show the agreed configuration and procedures rather than only a finished promotional animation.
Agree on what should happen if playback stops or a signal path is lost. Where backup functions are included, have the supplier demonstrate their behavior using an approved test procedure. Record whether the screen changes source automatically, requires an operator action, or retains an image. The event team needs to know that behavior before deciding where a backup is worth adding.
Finish with a handover that someone other than the original installer can use. Include labeled connection diagrams, software and firmware versions, configuration backups, cabinet identification, and a spare-parts list. Keep a copy accessible to the touring crew without relying on a single technician’s laptop. For repeat events, record the approved brightness settings and content version alongside the layout, then recheck the installation conditions at each venue.
8. FAQs
01. Can the same cabinets be reused as a straight rental wall?
Possibly, if the manufacturer approves the mechanical connections, electronics, and mounting arrangement. Confirm how corner-specific cabinets behave in a flat layout and whether their edges require protection. Request a separate drawing and configuration file for each layout you intend to rent.
02. Does a four-sided display need four media players?
Not necessarily. One playback system may supply a combined canvas through a suitable controller, while other projects use independent sources. The choice depends on content independence, synchronization requirements, supported resolution, and input routing. Confirm the complete signal path rather than equating one face with one player.
03. Can the top of the column be covered?
Only with an approved design that preserves ventilation, maintenance access, and any required weather management. A decorative lid is different from an illuminated fifth face. Either can change the structure, cable routing, and service procedure, so include it in the original brief.
04. Where should a QR code go?
Keep the complete code on one flat face, away from the corner. Test the real code, displayed size, contrast, and scanning distance with representative phones under event lighting. Avoid assuming that a code readable in the artwork file will scan reliably on the installed screen.
05. Can spare modules from another batch be used?
Compatibility requires more than matching physical dimensions. Verify the electrical specification, pixel arrangement, configuration, and color matching with the supplier. Store the relevant calibration and configuration information with the spare inventory, and test a replacement before relying on it at an event.
06. How much does a square column LED display cost?
A useful quote depends on face dimensions, pitch, corner construction, environment, control equipment, support scope, and spare inventory. Request itemized installed quantities and separate options. A price per square meter alone cannot show whether two offers include equivalent working systems.
9. Turn Your Event Layout into a Buildable Column
Before requesting a square column LED display quotation, prepare a floor plan, face dimensions, viewing distances, sample content, installation method, event environment, and expected rental reuse. Add the camera requirements and available setup time when they affect the choice.
Send your project brief to EagerLED and request a proposed cabinet layout, corner detail, native pixel map, service-access plan, and itemized equipment list. These documents give your AV team a practical basis for reviewing the display and comparing the complete rental package.