

LED wall chroma subsampling reduces the spatial detail carried by the color-difference channels of a video signal. For a meeting-room or control-room wall displaying small colored text, specify a verified RGB or YCbCr 4:4:4 path where the selected equipment supports it. A 4:2:2 or 4:2:0 stage can soften colored edges even when the signal still reports the expected resolution. However, chroma is only one possible cause of unclear text.
This guide is for AV integrators comparing a fixed indoor LED display and its signal chain before purchase. It explains the sampling choices, separates them from scaling and bit depth, and proposes a repeatable demonstration using the customer’s working content. The objective is a documented, readable result at the agreed operating mode.
The diagrams are illustrative planning aids, not EagerLED laboratory measurements or downloadable diagnostic patterns. Device support varies with the connector, resolution, frame rate, bit depth, firmware, and processing mode. Confirm the complete combination for the equipment being quoted.
1. What LED Wall Chroma Subsampling Changes
YCbCr represents an image with a luma component, Y, and two color-difference components, Cb and Cr. Sampling can retain the full luma grid while reducing the number of chroma samples. The physical red, green, and blue emitters on the LED wall do not disappear; the change concerns the information used to reconstruct their output.
Microsoft’s documentation on YUV video formats describes 4:4:4 as having no chroma downsampling, 4:2:2 as reducing chroma horizontally, and progressive 4:2:0 as reducing it horizontally and vertically. For LED wall chroma subsampling, a useful starting point is a region containing four luma positions across and two down.
01. Read the ratios as sampling relationships
In that eight-position region, 4:4:4 carries eight samples for each of Y, Cb, and Cr. With 4:2:2, Y still has eight samples, but Cb and Cr have four each. With 4:2:0, each chroma component has two. These are sample counts, not counts of available colors, LED lamps, or display pixels.
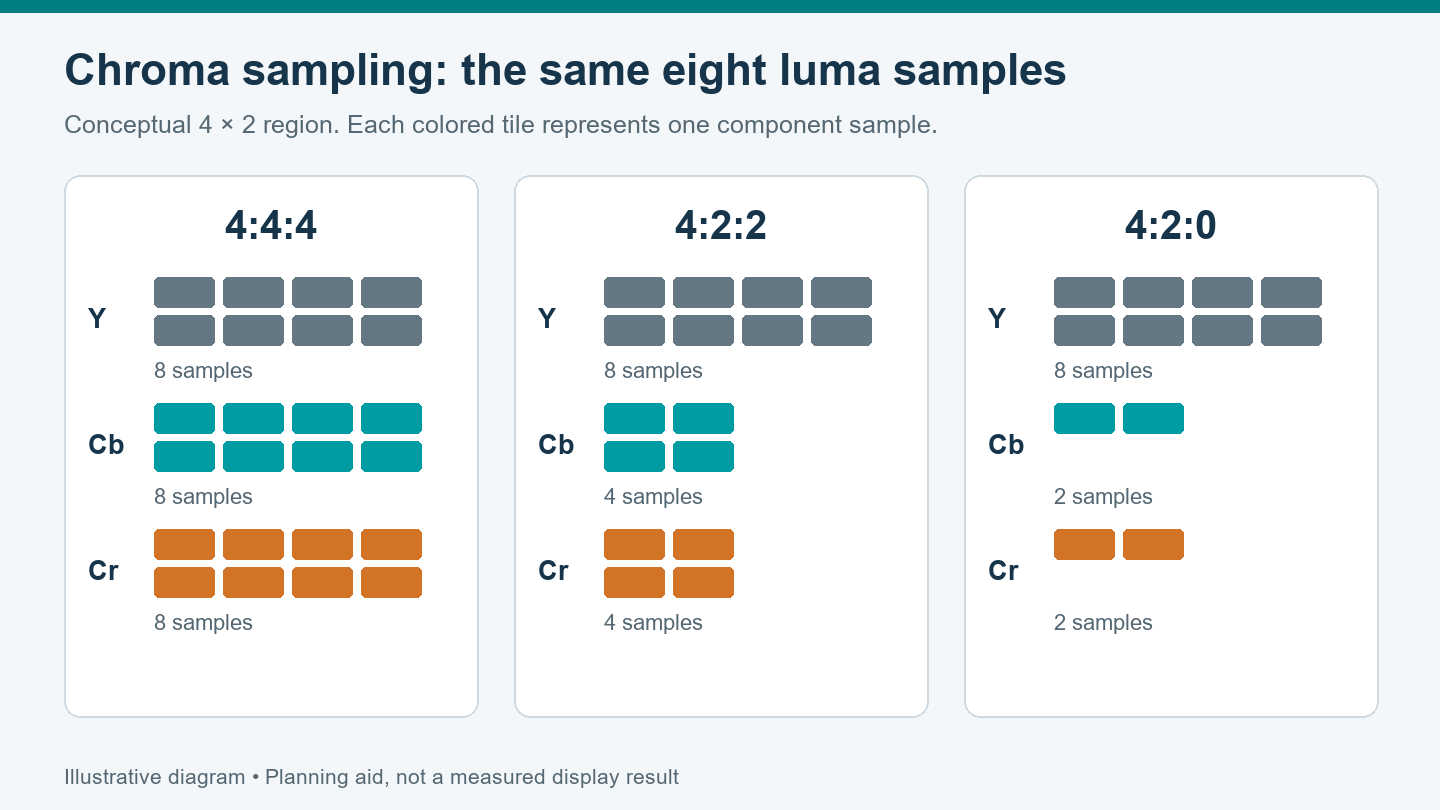
| Format | Y / Cb / Cr samples in the region | Total component samples | Color-detail decision |
|---|---|---|---|
| YCbCr 4:4:4 | 8 / 8 / 8 | 24 | Preserves a chroma sample at every luma position. |
| YCbCr 4:2:2 | 8 / 4 / 4 | 16 | Halves horizontal chroma resolution; test fine vertical colored edges. |
| YCbCr 4:2:0 | 8 / 2 / 2 | 12 | Halves chroma resolution in both axes; test fine colored detail in both directions. |
The totals explain the reduction in component samples. They are not HDMI link-rate calculations: transport packing, timing, coding, compression, and other overhead also matter. Likewise, the sample-count diagram does not prescribe a filter. Actual chroma placement and reconstruction differ between formats and implementations.
02. Understand the limit of upsampling
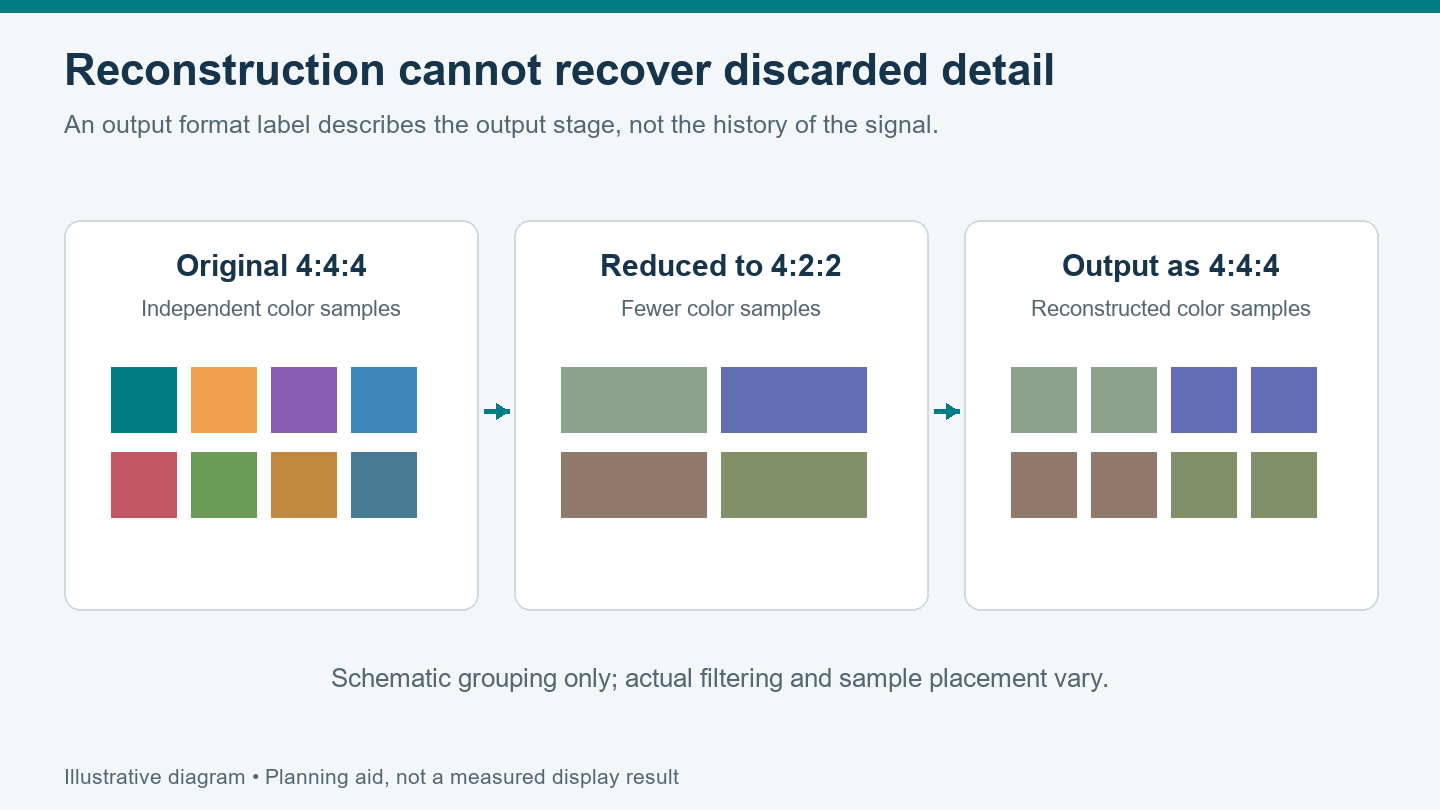
A downstream processor may reconstruct a 4:4:4 grid from a subsampled input. That does not recover the original independent color detail that was discarded. An output-status label reading “4:4:4” therefore cannot establish that the entire path preserved the original information. Check where reduction first occurred.
2. Decide Whether the Content Needs Full Chroma Detail
LED wall chroma subsampling deserves particular attention when the screen carries dashboards, spreadsheets, diagrams, or a computer desktop. Narrow colored strokes and abrupt color transitions can reveal losses that are less obvious in ordinary moving images. Matrox’s color-space guidance and Extron’s scaling documentation both distinguish computer graphics from natural video when discussing sampling quality.
Consider a room where the operator must distinguish small colored status labels. The acceptance question is whether those labels remain clear through the installed path. Showing an attractive landscape video does not answer it. Ask the customer for the actual application, including its smallest necessary text, line weights, and normal background colors.
01. Use the viewing task to set priorities
A wall used mainly for camera footage may accept a subsampled source as part of its normal workflow. A wall used for detailed desktop work has a different requirement. Specify the modes needed by each source instead of declaring one signal format universally acceptable or unacceptable.
For LED wall chroma subsampling checks, inspect the image close enough to identify edge artifacts, then judge readability from the intended seats. Those are separate observations. A technically clean one-pixel line may still be too small for a viewer across the room. Enlarging essential labels can improve usability even after the signal path is correct.
02. Keep a clean reference
Start with an original lossless RGB graphic or directly rendered desktop content. A screenshot copied through a messaging service, or a previously compressed video, may already contain altered edges. Preserve the original file and document its dimensions. Do not use the illustrations on this page as a sampling test: the browser and website may resize them.
3. Separate Chroma Sampling from Other Image Settings
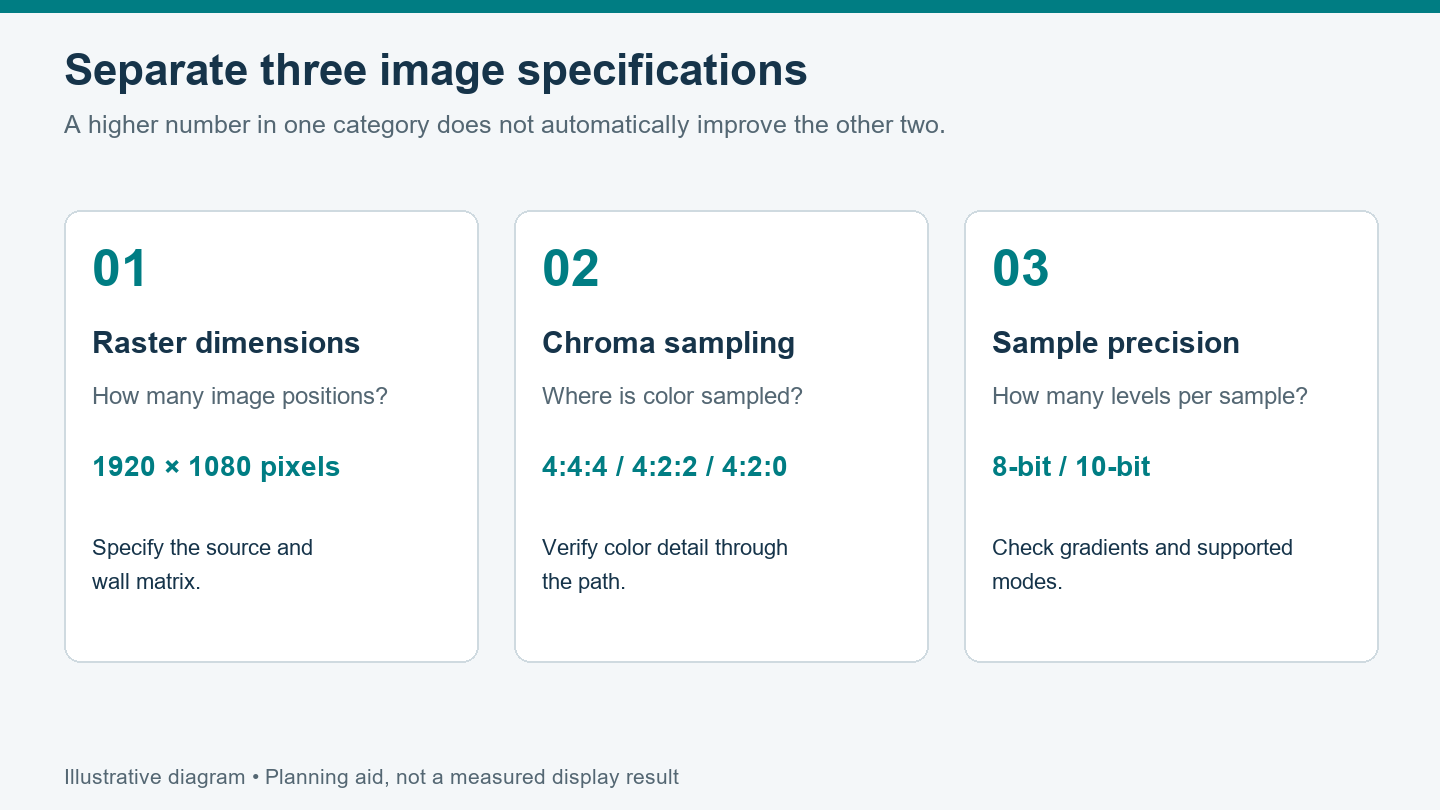
LED wall chroma subsampling is not another name for low resolution. Raster dimensions describe image positions across and down. Chroma sampling describes the spatial sampling of color-difference information. Bit depth describes the precision available for each component sample. A quotation needs all three, together with the required frame rate.
01. Check scaling before blaming the signal format
A 3840 × 2160 source scaled to a 1920 × 1080 display cannot preserve every original one-pixel feature, even with full chroma sampling. Both the luminance and color detail may change during resizing. Verify the wall’s native pixel matrix and the processor’s image window before judging a fine-detail pattern.
For an initial diagnosis, use a native-size source or a supported, unscaled image window. If the project normally requires scaling, test that operating mode separately and obtain acceptance of the result. EagerLED’s LED wall EDID guide explains why an advertised input resolution and a physical cabinet matrix are different specifications.
02. Treat bit depth and range separately
Increasing sample precision does not replace missing spatial samples. For example, 10-bit 4:2:2 and 8-bit 4:4:4 make different tradeoffs; neither label alone proves a better result for every image. Check gradients and fine colored text separately instead of choosing hardware from one headline number.
Full and limited signal range describe another setting. A mismatch can affect black and white levels without establishing a chroma-sampling fault. NVIDIA’s display documentation lists output color format, color depth, and dynamic range separately. Match the source and receiver settings using their documentation rather than assuming “full range” and “4:4:4” mean the same thing.
A practical LED wall chroma subsampling review also avoids confusing input frame rate with LED drive refresh rate. A high module-refresh specification does not prove that a processor accepts the required color format at the selected source frame rate. Request the supported combination, not a collection of unrelated maximum values.
4. Trace Every Stage That Can Change the Image
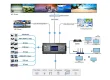
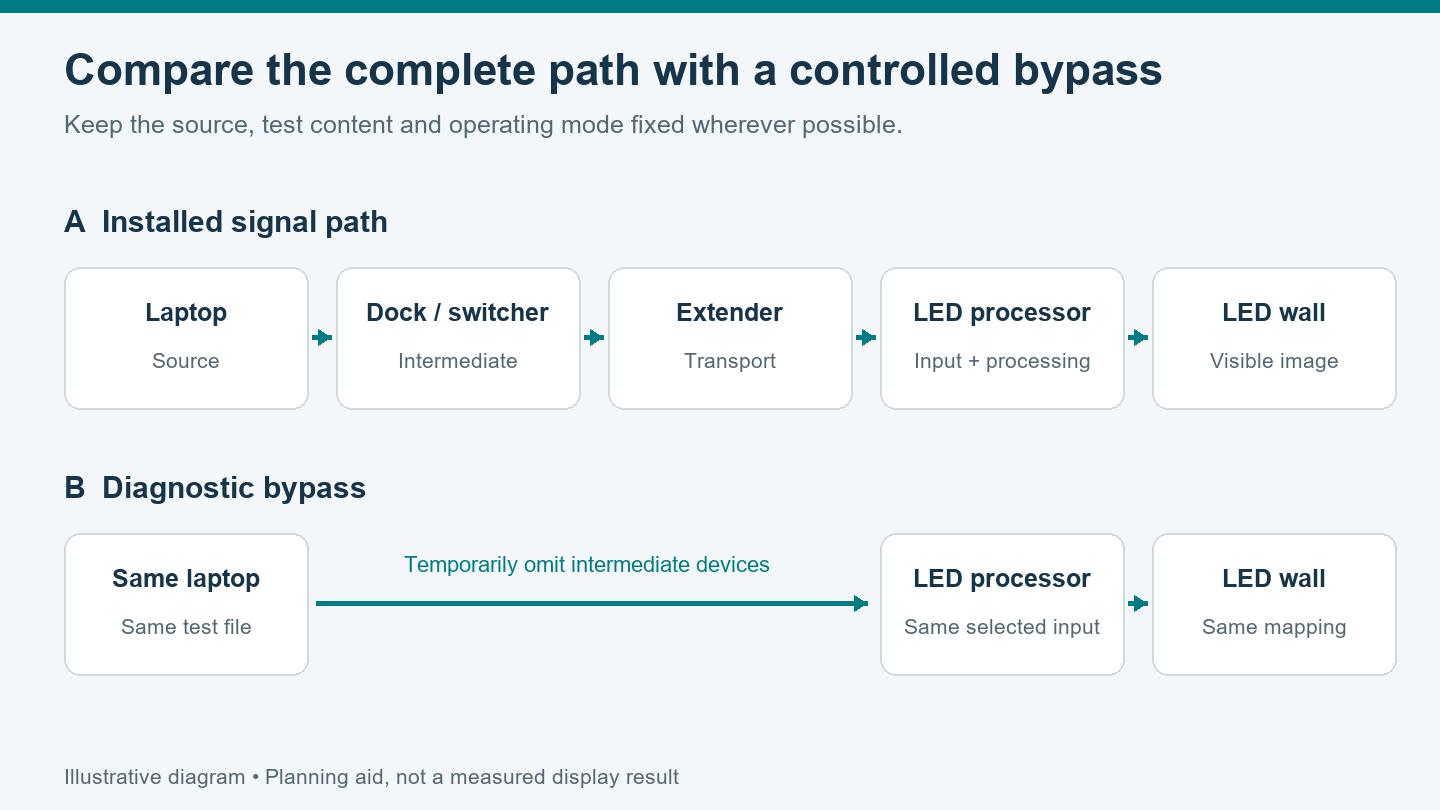
Review LED wall chroma subsampling from the original content to the visible wall. List the source computer, dock or adapter, switcher, extension system, processor input, internal processing mode, and display mapping. Include wireless presentation or network-video equipment when it forms part of the real installation.
Ask what each stage accepts, what it processes internally, and what it outputs. Those capabilities need not be identical. “Accepts 4:4:4” is useful but incomplete if a later processing mode reduces color detail. Conversely, do not assume every extender or switcher changes sampling; verify the selected model and mode.
01. Record a complete operating mode
Use a format line such as “1920 × 1080, progressive, 60 Hz, RGB, 8-bit, agreed signal range” as an illustrative documentation format, not a universal recommendation. Record the actual values required by the project. Identify the input connector and any adapters rather than relying on the product family’s marketing name.
For LED wall chroma subsampling, read the source’s selected output and the receiver’s detected input where available. If a device does not report the relevant information, mark it unknown and request documentation or a suitable signal-analysis method. A menu choice is useful evidence, but the final image still needs testing.
02. Compare an installed path with a bypass
A direct source-to-processor connection can help isolate intermediate equipment. Keep the file, processor input, mapping, and operating mode unchanged where possible. Bypassing a device may change the source’s negotiated mode, so record it again. If the image improves, restore the omitted stages individually and compare the actual formats at each step.
5. Run a Controlled Text-Clarity Demonstration
A useful LED wall chroma subsampling demonstration follows a written sequence so that the supplier and integrator can repeat it. Agree the target mode, test files, image placement, room lighting, and inspection positions before the session. Keep a copy of the initial configuration so changes can be reversed.
01. Establish geometry and a monochrome baseline
Display a border and position markers to expose cropping or misplaced regions. Use a circle to check proportions, then inspect black-and-white text and line patterns. For diagnostic pixel patterns, verify one-to-one mapping through the application, operating system, processor, and wall; a browser’s zoom label alone does not prove it.
If monochrome detail is already softened, first investigate resizing, source rendering, and image placement. Avoid changing several controls together. Record one change and its result before moving on. A sharper-looking image after enabling an enhancement filter is not proof that the underlying samples were preserved.
02. Introduce colored edges without changing geometry
Next, use colored text and fine horizontal and vertical color transitions on suitable contrasting backgrounds. Compare the same regions with the monochrome reference. Look for merged strokes, softened boundaries, or a change when an intermediate device is introduced. Appearance alone does not identify the responsible component.
When the equipment supports alternative sampling modes, compare them while retaining the same raster, frame rate, sample precision, and image window. If another setting must change, document the difference. Otherwise, an apparent LED wall chroma subsampling improvement might actually come from a new scaling ratio or a different rendering path.
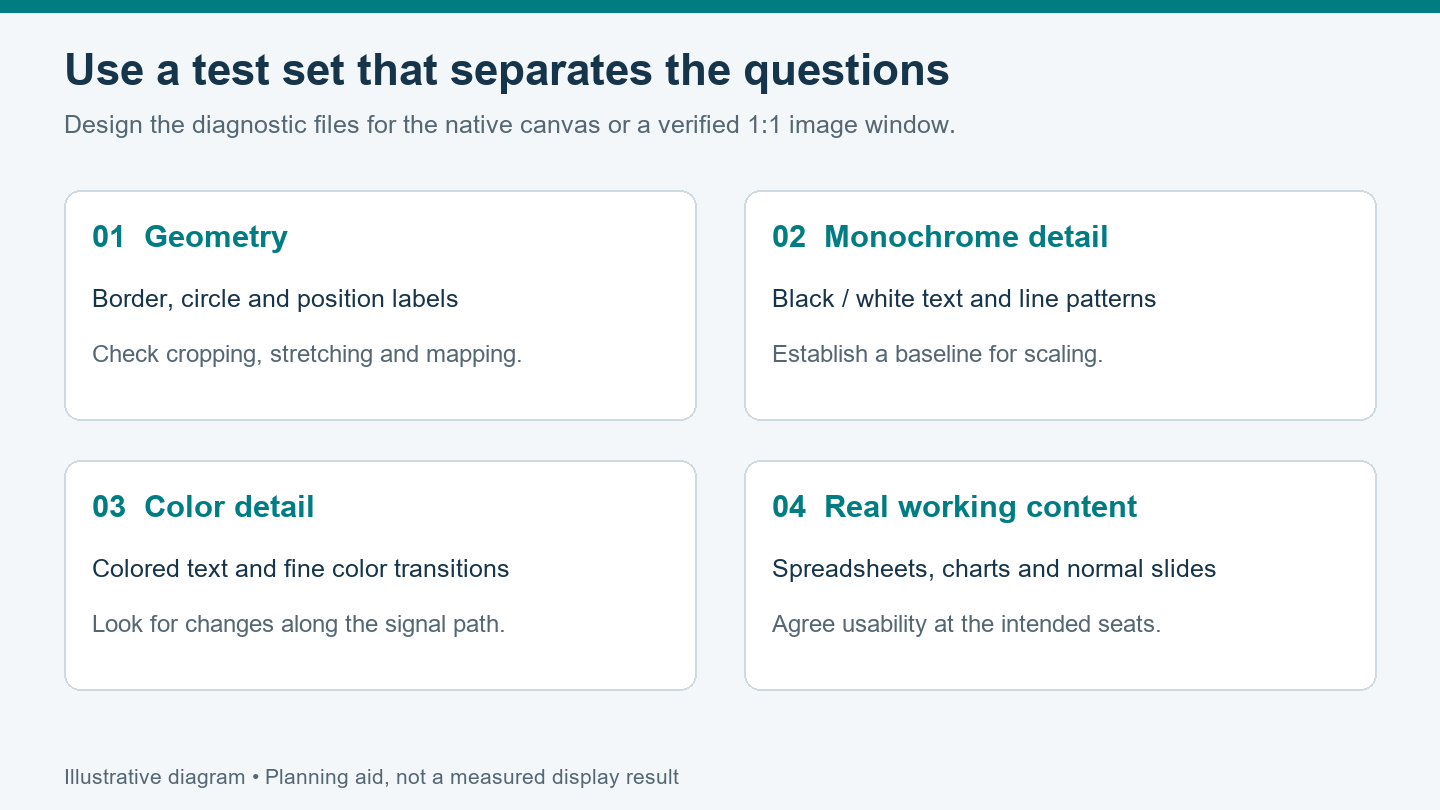
03. Finish with the customer’s real workflow
Open the actual spreadsheet, dashboard, or slide deck through the intended connection. Repeat essential checks after a normal source switch and reconnection. Record whether the source returns to the accepted mode. For a room with multiple source types, keep an acceptance entry for each required path.
Use photographs to document the setup and observed symptoms, but account for camera focus, exposure, moiré, and image compression. A screenshot captured on the source computer cannot show a loss introduced farther downstream. Keep direct visual observations and device-status records alongside images.
6. Interpret Symptoms Without Jumping to a Hardware Verdict
Use LED wall chroma subsampling as one hypothesis in a structured check. A screen with unclear text may have more than one problem. The table below helps choose the next comparison; it does not establish a diagnosis or authorize a hardware replacement.
| Observation | Next comparison | What it can clarify |
|---|---|---|
| Colored text degrades more than monochrome text. | Compare a clean source through the bypass and installed paths at the same mode. | Whether color-detail changes correlate with a particular stage. |
| All fine lines look soft. | Compare native mapping with the normal scaled window. | Whether resizing or source rendering is involved. |
| Dark and bright areas look incorrectly expanded or clipped. | Check matching range settings using a suitable level pattern. | Whether a range mismatch needs separate correction. |
| A fault follows a cabinet boundary. | Compare patterns across that boundary and inspect mapping and configuration records. | Whether a local display issue needs investigation. |
| The defect appears only in a photograph. | Compare direct observation with a controlled camera setup. | Whether capture artifacts are being mistaken for screen defects. |
Do not use calibration as a substitute for signal-path diagnosis. Uniformity correction addresses a different part of image reproduction from missing upstream color samples. EagerLED’s LED display calibration explanation provides background for assessing brightness and color consistency across modules.
If the accepted direct path is clear and the installed path is not, document the smallest reproducible difference. For an LED wall chroma subsampling support request, include the file, hardware revisions, selected mode, detected input, image-window dimensions, and the exact region that changes. This is more actionable than a photograph labeled “bad quality.”
7. Make Text Clarity Part of the Quotation
Specify the complete supported operating modes and the content to be demonstrated. For LED wall chroma subsampling, request written confirmation of the selected input format and whether the proposed processing path reduces chroma resolution. Include the exact connector and any limitations when multiple layers, higher bit depths, or other features are enabled.
Ask the supplier to quote necessary adapters, processing equipment, and configuration work as part of the same scope. Agree who supplies the source computer and who verifies intermediate devices. A proposal covering only the LED cabinets cannot establish the performance of equipment purchased separately.
Consider two hypothetical offers for the same wall. The first says only “4K input supported.” The second identifies the proposed input card, the supported raster and frame rate, the color format and bit depth, and the planned image window. The second provides more information for comparison, but it still needs an agreed demonstration. Neither statement alone proves that the customer’s detailed dashboard will remain readable through an existing room switcher.
Assign an owner to each open question. The display supplier can confirm the offered processor configuration, while the integrator may need to verify a retained dock or extension system. Keep an unresolved device visibly marked in the schedule instead of silently assuming it meets the requirement. When the client accepts an alternative mode, record the specific compromise and the content used for approval. This keeps a technical exception from becoming a vague promise about overall image quality.
Keep the accepted configuration, test-file revision, source modes, and unresolved exceptions with the handover records. If equipment is substituted before delivery, repeat the relevant checks. The wider indoor LED video wall commissioning checklist can help place this image-quality test within the installation acceptance process.
8. Frequently Asked Questions
01. Does 4:4:4 mean that the signal is uncompressed?
No. Chroma sampling and compression are separate properties. A codec or transport may preserve a full chroma grid while still compressing its data. Request the sampling format and compression behavior separately, and verify the image at the required operating mode.
02. Will HDR automatically improve small text?
No. HDR concerns a different set of image and signal requirements. Enabling it can change the available operating modes on a particular system. Test the intended SDR and HDR workflows independently, and do not treat an HDR label as proof of full chroma preservation.
03. Can changing from P2.5 to P2 fix color-detail loss?
A finer pitch can increase the wall’s native pixel count at the same physical size, but it cannot recreate color information discarded earlier in the chain. Confirm the signal path before attributing the symptom to pixel pitch or paying for a different display configuration.
04. Can a conference-room screen-sharing path change the result?
Yes, its capture, encoding, transmission, and decoding may differ from a direct cable connection. Test the actual presentation method with the same content. A successful local HDMI demonstration does not establish the quality of a wireless or remote-sharing workflow.
05. Will a premium HDMI cable automatically enable 4:4:4?
No. The cable must support the required signal, but source, adapter, input, and processing capabilities also matter. Confirm the complete mode and supported cable arrangement. A cable replacement alone cannot add a missing processing capability.
9. Prepare Your Display and Signal-Path Review
Send EagerLED the intended wall dimensions, native-resolution target, source-equipment list, connection diagram, and examples of the smallest text that must remain readable. Identify each required source mode and whether the installed workflow includes switching, extension, or screen sharing.
Request an LED display and control-system review with a defined LED wall chroma subsampling check. Ask for a supported configuration and a repeatable demonstration before approving the final equipment list.