

An LED display site survey should produce a reliable record of the space, audience, access routes and available services before suppliers finalize a quotation. Its most useful output is a shared evidence package: measured drawings, identified photographs, operating requirements and a list of unresolved items with named owners.
This guide is for buyers, distributors, AV integrators and project contractors preparing an indoor installation, outdoor display or event venue. It explains how to make site information usable for a supplier. It does not replace structural design, electrical design, local approvals or a model-specific installation manual.
Use the worksheets as a proposed project process. Dimensions and scenarios marked as examples are hypothetical. An LED display site survey should distinguish what someone measured from what a drawing suggests, what the owner requested and what a specialist still needs to approve.
1. Agree the LED display site survey purpose
Begin by asking which decision the survey must support. A budget enquiry needs a different confidence level from a release for manufacture. Label the package accordingly. If the project only needs an initial estimate, suppliers can identify assumptions. Before production, critical dimensions and interfaces need the appropriate verification and approval.
List the people who control the information. The display buyer may know the content plan while the venue manager controls access and the building team holds drawings. An LED display site survey works better when those roles are identified before the visit. Otherwise, a technician may collect many photographs without obtaining the answers that determine the design.
AVIXA’s site-survey guidance emphasizes exact dimensions, infrastructure, viewing conditions and accessible records with dates and version control. For an LED project, turn that principle into evidence that another person can interpret without attending the visit.
Prepare a site reference before measuring: project name, building, room or facade, orientation, proposed screen position and survey date. Give each photograph a matching identifier. Use one coordinate convention on drawings, such as left and right when facing the display. State the convention explicitly because rear-view photographs can otherwise reverse the intended interpretation.
Keep an assumptions register from the beginning. In an LED display site survey, a closed ceiling, inaccessible service corridor or unfinished floor is a finding. Record the limitation and who will resolve it. An empty field should not quietly become a supplier’s approval to choose any convenient dimension.

2. Measure the complete installation envelope
Record the opening or available wall area separately from the desired illuminated area. Include the location of the finished floor, ceiling and nearby features. A dimension marked “screen width” is ambiguous unless the team knows whether it describes visible pixels, cabinet edges, decorative trim or the space available for the whole installation.
Measure at the locations that affect fit. A recess may have different usable widths at the top and bottom. Surrounding finishes may not be complete. State whether measurements reference existing surfaces or planned finished surfaces. An LED display site survey should leave enough context for the supplier to understand these differences.
| Measurement | Record with the value | Decision supported |
|---|---|---|
| Available opening | Reference edges, units and measurement positions | Whether the complete assembly can fit. |
| Requested image area | Desired width, height and alignment | Cabinet matrix and content proportions. |
| Available depth | Obstructions and finished surface reference | Frame, cabling and service envelope. |
| Screen elevation | Bottom edge relative to agreed floor datum | Sightlines and access planning. |
| Unverified dimension | Reason, owner and confirmation date | Whether quotation or production must remain conditional. |
Consider a hypothetical opening that measures 3,050 mm wide and a proposed six-column arrangement of 500 mm cabinets. The cabinet width totals 3,000 mm. The remaining 50 mm is not automatically enough for the complete installation. Trim, tolerances, mounting details and access requirements must still be resolved by the design team.
This simple example shows why an LED display site survey cannot stop at dividing wall width by cabinet width. Ask the supplier to return a dimensioned assembly drawing that shows the boundaries being compared. Do not approve manufacture solely because a nominal cabinet count fits the largest measured opening.
For corners and curves, record the intended shape and the reference points used to describe it. Photographs can show the concept, but they do not establish a radius or angle accurately enough for every design. Ask which dimensions the proposed system requires, then have the responsible surveyor or designer confirm them.

The EA500H9 product page identifies a 500 × 500 mm cabinet family. Use the approved drawing for the exact ordered configuration when comparing it with the site. An LED display site survey supplies site evidence; the final equipment drawing supplies the matching product dimensions.
3. Record audience positions and real content
Mark where people will normally view the screen, not just the position that produces the best photograph. Include the nearest routine viewer, the farthest important viewer and meaningful side approaches. Record whether people are seated, standing, walking or looking through glass. These observations help define which content must remain readable.
An LED display site survey should connect each viewing position to a task. Reading a schedule, recognizing a face and seeing a large brand mark impose different demands. Ask the content owner to provide representative material, especially the smallest information that matters. Keep that sample with the survey package so suppliers evaluate the same requirement.
| Viewpoint | Audience task | Evidence to collect |
|---|---|---|
| Nearest normal position | Read the smallest essential text | Distance, viewing height and actual content sample. |
| Main gathering area | Follow the principal message or presentation | Wide photograph with screen position identified. |
| Side approach | Recognize information before reaching the front | Approach direction and obstructing features. |
| Farthest required position | Read the agreed headline or key information | Distance and the required visible content elements. |
| Camera position, if relevant | Capture the display in the intended production | Planned framing and camera-test responsibility. |
Document lighting conditions with their context. A photograph taken on an overcast morning does not describe a sun-facing window at every operating hour. Record the time, weather, nearby windows and existing lighting state. If a critical condition was not observed, mark it as a follow-up requirement rather than extrapolating from one visit.
A camera’s exposure can make a bright room look darker or a display look more vivid. For an LED display site survey, photographs are location evidence and a useful discussion aid. They should not be presented as calibrated light measurements. Where measurement is needed, record the instrument, position, units and method used by the responsible specialist.
Leave pixel-pitch selection as a response to these requirements. Avoid declaring that one distance automatically demands one pitch for every application. Ask shortlisted suppliers to demonstrate the representative content at the relevant viewing position. The site package should make that comparison repeatable without predetermining an unsupported answer.
4. Prove service and delivery access
Draw the route a replacement component will take from its installed position to a safe handling area. A front-service label does not describe every maintenance operation. Ask which parts can be removed from which side, how much working space the procedure needs and whether adjacent finishes obstruct the operation.
In an LED display site survey, record the service envelope as usable space, not simply empty space in a photograph. Furniture, temporary barriers, doors and public circulation can change whether technicians can work there. Confirm who can make that area available and what operating restrictions apply during service.

Trace the delivery route from the unloading point to the screen location. Record the narrowest doors, turns, lifts and changes in level that affect the proposed packed equipment. The screen may fit its final wall while its largest case cannot reach the room. Ask the logistics provider to review actual package dimensions and handling needs.
Do not turn an LED display site survey into a lifting plan. The survey identifies constraints for the responsible logistics and installation specialists. Record loading-bay booking, storage restrictions and allowed working hours as operational facts. The qualified team must determine suitable handling equipment and safe methods for the actual load.
Also identify where removed parts and packaging can be placed. A crowded corridor may offer no protected area for a module during service. Record a proposed work zone and ask the venue to confirm availability. This small operational detail can matter as much as a cabinet’s advertised maintenance direction.
For an unfinished site, revisit the access assumptions before delivery. An LED display site survey completed before reception desks, glazing or doors are installed may no longer describe the route. Keep the earlier record, add the changed condition and obtain an updated decision from the person responsible for the delivery plan.
5. Document power, data and environmental interfaces
Record where services are available and who can verify their suitability. A nearby socket is evidence of a location, not proof of adequate electrical capacity. Similarly, a network outlet does not establish permission to connect a controller or use remote management. Separate physical observations from the specialist approvals needed for the design.
For an LED display site survey, identify the proposed control-equipment location and the route to the screen. Measure the route that cables can actually follow, including changes in level and required diversions. Do not substitute the straight-line distance across a room for the installed path without explaining the assumption.
| Interface | Survey evidence | Who confirms the final requirement? |
|---|---|---|
| Electrical supply | Location and available project documentation | Responsible electrical designer or qualified contractor. |
| Signal transport | Source location, proposed pathway and route length | AV integrator with the equipment supplier. |
| Network access | Outlet location and operational use requested | Site IT owner and authorized system designer. |
| Mounting interface | Visible construction and available building drawings | Responsible structural or installation designer. |
| Heat and exposure | Enclosure, sunlight, ventilation and site conditions | Relevant building specialist and display supplier. |
Identify whether power and data terminations remain reachable after installation. Drawings should show how cables enter the cabinet area without relying on an inaccessible connection behind finished work. An LED display site survey should flag uncertain connection points so the design team can resolve them before the installation closes the space.
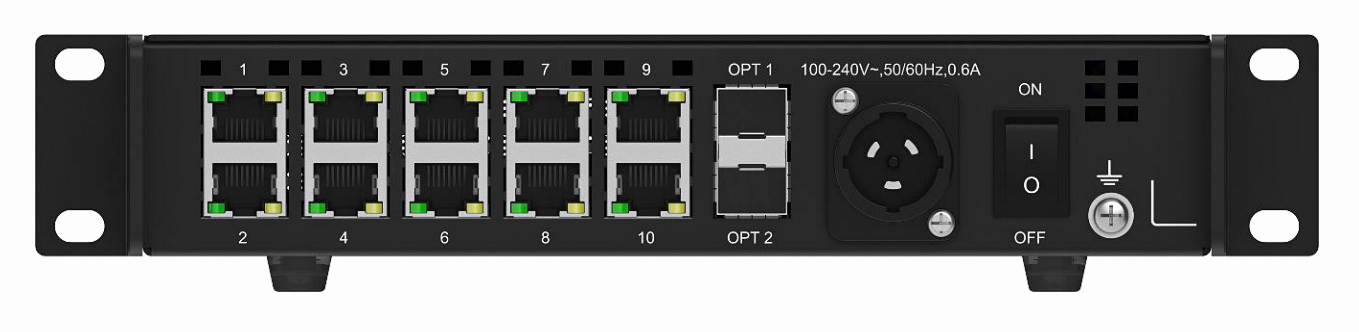
For environmental conditions, describe the actual exposure. Note sheltered and exposed faces, nearby water sources, dust-generating activities and enclosed spaces. Avoid selecting an enclosure rating from the words indoor or outdoor alone. Ask the supplier to assess the exact installation with the applicable project requirements and supporting product documentation.
Record planned operating hours and who controls brightness or content schedules. These are useful inputs for the supplier’s operating proposal. Keep maximum equipment ratings separate from expected operation; the survey itself does not establish measured power consumption. Do not publish an energy or cooling estimate as a verified result without its underlying calculation and conditions.

6. Issue a usable LED display site survey package
Organize the deliverable around decisions. Include a short project brief, measured plan and elevation, photograph index, audience matrix, service-interface schedule and unresolved-item register. An LED display site survey package should allow a supplier to identify both the requested outcome and the limitations of the available evidence.
| Status | Meaning | Next action |
|---|---|---|
| Measured | Observed value with reference and date recorded | Use within the stated measurement limits. |
| Document supplied | Value taken from an identified project drawing | Confirm revision and applicability to finished work. |
| Owner requirement | Requested outcome, not a measured condition | Ask the designer or supplier to demonstrate feasibility. |
| Assumed | Temporary input used for an initial estimate | Name the owner and deadline for verification. |
| Unresolved | Information or approval remains unavailable | State which decision must remain conditional. |
Send the same accepted revision to every bidder. Ask each supplier to list departures and missing information explicitly. If one quotation includes site work and another excludes it, resolve that difference before comparing totals. The LED display site survey is valuable because it gives those conversations a common factual starting point.
When a measurement changes, issue a revision with the affected drawing and a short change note. Do not overwrite the previous package without explanation. Require confirmation from anyone whose design depends on the changed value. This is especially important when cabinet counts, access routes or source locations have already entered a supplier’s quotation.
Before sending the package, ask a colleague who missed the visit to locate the proposed screen and trace the service route using only the documents. If that person cannot identify a reference edge or match a photograph to the drawing, add the missing context. This practical review helps an LED display site survey communicate beyond the team that collected it.
Close the process with an agreed next decision. The package may be ready for budget pricing, ready for detailed design, or waiting for a particular specialist review. An LED display site survey is complete for its stated purpose when the evidence and outstanding conditions are clear, not when every field has been filled with a guess.
7. LED display site survey FAQ
Can we complete the survey remotely?
A remote LED display site survey can support an initial discussion when a competent person collects reliable measurements and photographs. State what was not inspected directly. Critical fit, access and infrastructure questions may still need an on-site check before the project proceeds.
What if the building is still under construction?
Use identified drawings and label planned dimensions clearly. An LED display site survey for unfinished work should include a later verification point. Ask who will confirm finished surfaces, access routes and service locations before equipment dimensions become irreversible.
Should we report the wall width or the screen width?
Report both and define their boundaries. The LED display site survey should distinguish available opening, desired image area and total assembly envelope. This prevents the supplier from treating decorative trim or maintenance space as usable pixel area.
How should cable length be recorded?
Record the proposed installed route and its known diversions. Mark unverified sections rather than inventing a final length. The LED display site survey should provide route evidence; the system designer determines suitable cable and transport equipment for the confirmed path.
Do we need to select pixel pitch during the visit?
Not necessarily. Capture viewing positions and representative content first. An LED display site survey can then support comparison of appropriate samples. A pitch decision made without the actual readability requirement can narrow the options before the important evidence is available.
When should the site be checked again?
Repeat affected checks when relevant conditions change, such as finishes, access, screen position or service routes. The LED display site survey should identify these triggers. A dated package remains useful only while its assumptions still describe the installation being planned.
Who should sign off the survey?
Assign approval by responsibility rather than asking one person to certify everything. An LED display site survey may need owner confirmation of requirements, technical confirmation of measurements and separate specialist approvals. Record which part each reviewer accepts and what remains outside that review.
8. Conclusion
An LED display site survey turns a proposed screen location into information a supplier can use. Clear dimensions, identified viewpoints, workable access and explicit service responsibilities help the project move from assumptions to a reviewable design. Keep uncertain items visible and update the package when conditions change.
To discuss an EagerLED installation, send the EagerLED team your measured drawings, site photographs and content requirements. Include the current revision and unresolved questions. A well-prepared LED display site survey gives both teams a stronger basis for a configuration-specific quotation.