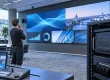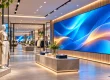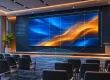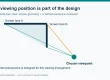


A shopping mall LED transparent screen can turn a glazed storefront, atrium edge or curtain wall into moving media while shoppers still see merchandise, people and daylight behind it. The right screen, however, is determined by the site: audience distance, reflected sunlight, glass geometry, mounting points and the team that will service it. A specification that looks excellent on a showroom wall may be unreadable at a bright entrance or too coarse for a close retail window.
This guide explains how to choose a shopping mall LED transparent screen as a complete project rather than as a panel purchase. It compares suitable locations, pixel pitch, transparency, brightness, structural loads, control systems, content and lifecycle cost. Use the three decision tables and procurement checklist to turn a vague request for a clear LED screen into a specification that installers, mall management and suppliers can evaluate.
Start by recording where viewers stand and whether the display is inside or outside the weather envelope. Then shortlist equipment, ask for a sample under real lighting and obtain a site-specific mounting design. The transparent effect is valuable only if the image and the view behind it both work for your retail objective.
Contents
- Where a transparent screen fits
- Pitch and viewing distance
- Transparency and brightness
- Indoor versus outdoor protection
- Structure and installation
- Content, control and connectivity
- Service and reliability
- Budget and procurement
- Site examples
- Final checklist
- Frequently asked questions
- Conclusion
1. Where does a shopping mall LED transparent screen fit?
01. Identify the real viewing surface
Walk the site during opening hours, after dark and at the busiest time of day. An inward-facing shop window, a balustrade around an atrium and an exterior curtain wall are different applications even when all contain glass. For each candidate location, mark the active display area, direction of view, nearest and farthest audience, eye height, obstructions, backlighting and access for maintenance. Photograph the window with the lights both on and off. This simple survey prevents a screen from being specified against a drawing that omits mullions, doors or seasonal displays.
A shopping mall LED transparent screen is most useful when preserving the view is a requirement. In a store window, visitors should still see products and staff. At an atrium, sightlines through a guardrail may be part of the architecture and safety plan. If the wall behind the display is opaque, a conventional indoor LED screen may give sharper images at lower total cost. Make the visual objective explicit before choosing the technology.
02. Define a measurable communication goal
Decide whether the display must stop passing traffic, announce offers, guide visitors, support tenant advertising or act as a landmark. Write down the content type, smallest essential text, typical dwell time and expected audience direction. A five-second promotional animation viewed across a concourse can tolerate a different pixel pitch from a price and QR-code message viewed at arm’s length. Avoid designing the hardware around a 4K source file; the useful resolution is the installed pixel count and the distance from which people see it.
Clarify who owns the screen, the media inventory and the control account. A mall-operated network needs approval rules and tenant scheduling; a single store may need one easy-to-use playlist. Those operating details affect the processor, remote management, network connection and quote. They should be included in the first brief, rather than discovered after the frame has been fabricated.
2. Choose pixel pitch from distance and content
01. Read both pitch directions
Pixel pitch is the center-to-center distance between LED pixels in millimeters. Transparent LED products often use different horizontal and vertical pitches because the light bars are separated by open gaps. Ask for the exact horizontal × vertical pitch, native pixel matrix of the proposed screen and LED orientation. A label such as P3.91 alone may hide a larger vertical spacing. Compare actual pixel count at the final width and height, not a pitch label in isolation.
Smaller pitch usually helps nearby viewers read fine details, while larger pitch can leave more open area for sightlines and daylight. This is a tradeoff, not a universal ranking. Test the smallest text, logo and product image at the closest real viewing point. Check whether the content remains legible while shoppers walk past; stationary showroom inspection is too forgiving.
02. Use distance bands as a shortlist
The table below is a planning aid, not a guaranteed visibility formula. Content contrast, eyesight, viewing angle and luminance change the result. Request a sample or full-size mockup before locking a shopping mall LED transparent screen specification.
| Site and audience | Starting pitch discussion | Content to test | Decision gate |
|---|---|---|---|
| Retail window; roughly 2–5 m | Fine transparent option, often around 3–5 mm horizontally | Short offer, logo, product outline | Read at walking speed from closest path |
| Concourse or atrium; roughly 5–12 m | Midrange pitch; compare open area and pixel count | Bold campaign animation, wayfinding | View from both levels and oblique angles |
| Large facade; beyond roughly 12 m | Coarser pitch may be acceptable | Large graphics with minimal text | Check daytime contrast at the farthest approach |
Do not place critical small text on a coarse transparent grid and assume software scaling will restore detail. A processor can resize an image; it cannot create LED pixels that are absent. If a campaign depends on detailed photography or tiny legal text, consider a conventional display elsewhere and use the transparent installation for larger visual messages.
3. Balance transparency, brightness and image quality
01. Measure what transparency means on site
Transparency describes the open portion of the screen assembly, but suppliers may use different measurement conventions. Ask for the stated method and inspect the actual cabinet, crossbars, cables and mounting rails. A percentage for the LED module alone can overstate the view through the finished installation. Have the sample switched off in front of the intended glass, then photograph the merchandise or atrium behind it from the shopper’s position.
More open area can preserve sightlines, but it also leaves less area for emitters and can reduce apparent image density. A highly transparent panel is not automatically the best shopping mall LED transparent screen. Where window merchandising is the primary purpose, favor a genuinely clear off-state. Where campaign impact across a sunlit atrium dominates, a denser or brighter screen may be justified. Confirm the choice with the people responsible for architecture, leasing and visual merchandising.
02. Test brightness in the actual light
Screen brightness is commonly stated in nits, equivalent to candela per square meter. The number alone does not predict readability: sun angle, tinted glazing, reflections, background color and automatic dimming all matter. An indoor screen behind glass may still face strong daylight. Conversely, running a high-output screen at full power in a dim corridor can cause glare and waste electricity. Ask the supplier to show usable minimum and maximum settings, the light sensor strategy and a daytime test at the intended location.
| Lighting condition | Main risk | Practical test | Control requirement |
|---|---|---|---|
| Interior corridor, stable lighting | Excess brightness and glare | Check close-view comfort and text | Scheduled dimming |
| Window facing bright concourse | Washed-out graphics | Mockup against daytime reflections | Adjustable brightness by zone |
| Sunlit glass facade | Heat, reflections, low apparent contrast | Test at worst sun angle | Ambient-light control and thermal plan |
| Night operation | Light spill beyond the site | Review after dark from public areas | Lower night profile and shutdown schedule |
Ask for the test image, brightness setting and ambient conditions to be recorded, so competing samples can be compared fairly. Strong contrast and uncluttered artwork often improve the perceived result more than simply selecting the highest headline nit figure.

4. Separate indoor protection from outdoor exposure
01. Define the weather boundary
Identify whether the LEDs, power supplies, connectors and service side sit wholly inside a conditioned building. A screen mounted behind glazing is not the same as a screen exposed to rain or wind. Condensation near entrances, cleaning spray, sprinkler zones and high humidity may still affect an indoor unit. Document these conditions for the supplier and ask for the exact protection rating of the complete proposed assembly.
An IP code classifies enclosure protection against solids and water under IEC 60529. It does not by itself certify structural strength, fire behavior or suitability for a particular mall. A single indoor IP recommendation cannot cover every shopping mall. Specify a rating for the environment and verify it on the product datasheet and installation details. EagerLED’s EA1000TOF outdoor product page, for example, describes IP65 for that specific series; it should not be assumed for every indoor screen.
02. Plan electrical and fire review
Ask the facility team which local electrical, building, fire and signage approvals apply. Confirm circuit capacity, isolation, protective devices, cable routing, emergency access and whether the screen intersects a fire-rated or egress element. A glass wall may look like available media space but carry architectural and safety obligations. Have a qualified local engineer and electrician review the mounting and electrical design before purchase.
Request model-specific compliance documents rather than accepting a generic brand certificate. Confirm the intended market, operating voltage, cable types and whether the documents cover the actual controller, power supply and display configuration. This avoids promising a certification that belongs to another product family.
5. Design the structure before ordering panels
01. Calculate the installed load
Transparent cabinets can be lighter than conventional enclosed LED cabinets, but the final load includes the panels, frame, power and data hardware, cable trays and any service platform. Weight per square meter is not a structural design. For a hanging installation, account for suspension hardware, dynamic effects and the load path into the building. For a glazed storefront, avoid assuming the glass itself can carry the screen. Obtain the allowable fixing points and a signed design from the responsible engineer.
Prepare a dimensioned drawing with cabinet grid, mullions, door swing, floor clearance and maintenance opening. Verify that module sizes allow a clean fit without cutting active areas. A small change in total width can alter the pixel matrix, frame position and media aspect ratio. If the shopfront is leased, seek landlord approval of fixings and concealed cable routes early.
02. Choose a serviceable mounting method
Discuss whether cabinets will hang, stack, fix to a secondary frame or sit behind a window. The least visible frame is not useful if a failed module cannot be removed. Front service may be necessary when access behind the screen is blocked, while rear service can be efficient in a dedicated service corridor. Check the exact replacement path for an LED module, power supply and receiving card. Ask the installer to demonstrate it with the proposed model.
Allow space for ventilation and cable bend radius. Do not cover power supplies with decorative cladding that traps heat. Record how cleaning crews will reach the glazing without striking the LEDs. A shopping mall LED transparent screen can be visually light while still needing a substantial engineered support and a practical service plan.
6. Specify content and control together
01. Design artwork for an open background
Transparent displays do not create the opaque black background familiar from a normal video wall. Dark pixels may appear as the scene behind the screen; bright graphics appear suspended in front of it. Use bold shapes, high contrast, short copy and generous spacing. Test campaigns against both a bright store interior and a dark closed store. Merchandise, shelving and sunlight can compete with the image, so a transparent effect that looks striking in a black demo room may be weak in a real mall.
Prepare content at the final native pixel matrix. Keep essential text inside a safe area away from cabinet joints, frame edges and mullions. If the display is split around a doorway, design separate layouts rather than placing a headline across the gap. Test vertical and horizontal motion, transition speed and accessibility for people walking along the concourse.
02. Map the signal and network path
Decide whether the screen plays from a local media player, a scheduled content management system or a live video source. Ask for a signal diagram from source to processor, sending device, receiving cards and cabinets. Include distances, cable type, network switches, power distribution and a route for remote support. Long runs may require fiber equipment, but fiber is not automatically necessary for every mall installation; the topology and bandwidth determine it.
Specify what happens when the network fails: continue the approved playlist, show a fallback message or turn the screen dark. Assign rights for tenant uploads and changes, and keep administrator credentials with the owner. Schedule brightness and playback by opening hours. A repeatable workflow is more valuable than a control system with features no one can operate.

7. Check reliability, service and visual consistency
01. Inspect the image beyond the demo loop
Ask the supplier to show white, gray, red, green and blue test fields, as well as your real campaign. Look for dead pixels, inconsistent brightness, color shift, banding and visible seams. View from the normal approach and from the sides. If the screen will appear in social video or live events, test it with the intended cameras and shutter settings; refresh rate on a datasheet does not guarantee a clean recording in every setup.
Request the production specification of LEDs, driver ICs, power supplies and control system, plus the factory calibration method. Ask whether spare modules will match the installed batch and whether recalibration is available after a replacement. A shopping mall LED transparent screen is often judged as part of a premium storefront, so a single mismatched module can matter more than a small theoretical brightness advantage.
02. Define access and spares
List every component that can fail and the time needed to replace it. Confirm front or rear access, tools, safe isolation and who can service the display during mall operating hours. Keep a sensible stock of matching spare modules, power supplies, data cables and receiving cards, agreed with the supplier based on size and business criticality. Ask for a wiring map, configuration backup and commissioning record.
Separate warranty duration from response arrangements. A remote diagnosis may be quick, while a replacement part can take much longer to reach a site. Put escalation contacts, spare ownership, travel responsibilities and acceptance criteria in writing. This matters especially for multi-tenant installations with paid advertising time.
8. Compare the complete project cost
01. Request comparable quotations
Ask each bidder to quote the same active width and height, pixel matrix, brightness target, protection requirement and control scope. A low panel price can exclude the frame, processors, shipping, installation, calibration, training and spares. Record what is included, what is provisional and what requires a site survey. Avoid choosing from price per square meter alone when one offer uses a much coarser pitch or omits the weather-rated parts.
| Cost line | What to request | Common omission |
|---|---|---|
| Display hardware | Model, cabinet count, pitch in both directions, spares | Mismatch between quoted and installed pixel count |
| Structure and access | Engineered frame, fixings, lifts and service route | Glass or building modifications |
| Power and signal | Distribution, cabling, processor and media player | Long cable or fiber runs |
| Commissioning | Calibration, content test, training and documents | Nighttime brightness tuning |
| Operation | Energy estimate, cleaning, spares and service | Future module replacement and access labor |
Evaluate total ownership over the intended operating period. Estimate energy from the supplier’s measured typical power at your actual brightness and content schedule, not only maximum power. Energy savings cannot be stated as a fixed percentage: the outcome depends on area, brightness, duty cycle and the conventional display used for comparison.
02. Use a written acceptance test
Before placing the order, agree on the tests that will decide acceptance: dimensions, safe fixing, pixel count, daytime legibility, night brightness, color uniformity, network fallback, content playback and module replacement. State where and when each test occurs and who signs it off. A factory video cannot substitute for the completed installation behind the actual glass.
Retain photos of the sample and record its settings. When a final screen differs from the approved mockup, those records help distinguish a hardware change from different ambient light or content. Include configuration files and a handover session in the acceptance package.
9. Apply the method to three mall locations
01. Storefront window
A fashion store wants changing campaigns while shoppers can still see mannequins. The nearest audience is close and moves quickly. Prioritize readable short messages, a fine enough pitch, an off-state view through the window and access from inside the store. Survey glare at midday and inspect the screen after dark when the interior may be dim. A fixed indoor transparent cabinet or film format may be considered, but sample both at the actual glass before selecting one. If the content is mainly fine product photography, a conventional digital sign in a smaller zone may work better.
02. Multi-level atrium
A central atrium is seen from several floors and oblique angles. Mark the nearest rail-side view and the longest cross-atrium view separately. A large image needs a cabinet grid and content design that read from both. Structural engineering, suspended load, fall protection and access equipment may drive cost more than a modest pitch change. Confirm that the open screen and its support frame preserve approved sightlines and that maintenance can occur without closing a major circulation route.
03. Exterior glass facade
A street-facing facade must be tested in direct sun and rain exposure. Decide whether the display is truly outside or behind sealed glazing, then specify brightness, thermal design and enclosure protection accordingly. Review wind loads, fixings, cable entries and local signage rules. EagerLED lists outdoor transparent series as well as indoor products, but the correct choice depends on the exact environmental boundary. Use the model-specific datasheet and an engineer’s design, not a generic category description.

10. Final shopping mall LED transparent screen checklist
01. Give every bidder the same brief
Send a drawing and photographs; active width and height; closest and farthest viewers; lighting observations; indoor or outdoor exposure; required transparency; proposed content; operating hours; structural constraints; power and network locations; service access; approval requirements; and target opening date. Ask bidders to state assumptions explicitly. If one cannot confirm a requirement, mark it unresolved instead of treating it as included.
Shortlist only solutions that pass a physical sample review and a credible installation plan. Request the model-specific sheet, native pixel count, cabinet weight, protection rating, typical and maximum power, service method, controller list, spare recommendation and warranty terms. Ask the supplier to identify what changes when the screen size is adjusted to fit the site. Compare the full installed scope and acceptance test, then make the purchase decision.
A well-chosen shopping mall LED transparent screen adds motion without sacrificing the purpose of the glazing. The best specification comes from the audience and site conditions, supported by a sample, an engineered frame and a maintainable operating plan. For product families and configuration options, see EagerLED’s transparent LED screen range and its guide to checking transparent screen quality.
11.Frequently asked questions
01. How long can a shopping mall LED transparent screen operate each day?
Many commercial LED systems can follow long daily schedules, but the allowed duty cycle depends on the selected model, ventilation and ambient temperature. Ask for the model-specific operating limits and plan automatic dimming or shutdown outside mall hours.
02. What is the expected lifespan of a transparent LED screen in a mall?
A published LED lifetime is usually a brightness-degradation test value, not a promise that every component will run without service for that period. Request the model-specific LED rating, power-supply warranty, expected spare-part availability and a maintenance plan.
03. How do staff clean the glass and the transparent LED screen?
Use the manufacturer-approved cleaning method for the exact product. Turn off and isolate the display when required, keep liquid away from connectors, and avoid pressure on LED bars. Include safe access to both the glazing and screen in the installation design.
04. Can one content system manage screens across several mall stores?
Often yes, if the players and control platform support multi-screen scheduling and permissions. Confirm the proposed system can assign content by store, keep a local playback copy during network outages, and restrict tenant access to approved screens.
05. Will QR codes scan reliably on a transparent LED display?
Scanning depends on pixel pitch, code size, contrast, viewing distance and the visible background. Test a real code on the installed pixel matrix from the shopper path with several phones. Put a printed or conventional digital backup nearby if scanning is essential.
06. What happens to the display after a power or network outage?
The behavior depends on the controller and media player. Specify automatic restart, the approved fallback playlist or blank-screen state, and who receives an alert. Test both power restoration and network loss during commissioning.
07. How long does a mall transparent LED screen installation take?
The schedule varies with survey, approvals, frame fabrication, panel production, cable routing and permitted work hours. Ask bidders for a site-specific sequence that includes testing and handover; the panel hanging time alone is not the full project duration.
08. Can a transparent LED screen be moved when a tenant changes stores?
Some cabinets can be reused, but the new opening may require a different cabinet grid, frame, controller configuration or weather rating. Before buying, ask which parts are reusable and what dismantling, transport and recommissioning would cost.
12.Conclusion
A well-chosen shopping mall LED transparent screen adds motion while preserving the purpose of the glazing. Start with audience distance, ambient light and the view that must remain open; then compare complete installed systems through a real-site sample, an engineered mounting plan and a written acceptance test. Confirm who will operate, clean and service the screen before ordering.
For product families and configuration options, see EagerLED’s transparent LED screen range and its guide to checking transparent screen quality.