


A transparent LED screen can look impressive in a showroom and fail at the actual storefront. The glass may face direct sun, the audience may stand closer than expected, or a support bar may interrupt the view. Judging quality therefore means testing the complete display against a real installation plan, not simply comparing a brochure’s brightness or transparency claim.
This guide explains how to judge the quality of an LED transparent screen before ordering and during acceptance. It covers image performance, transparency, components, electrical and mechanical construction, installation, service access, and the evidence a supplier should provide. Bring your content, site photos, dimensions, and viewing distances to the demonstration; a sample seen under only one lighting condition cannot answer every project question.
For a quick decision, shortlist displays that remain legible at the closest intended viewing point, preserve the required view through the glazing, operate reliably at the site’s lighting level, and come with a written test and maintenance plan. Use the checkpoints below to turn claims into measurable acceptance criteria.
Table of Contents
- Define quality for the installation
- Test image quality in real lighting
- Check transparency and viewing geometry
- Inspect components and workmanship
- Verify electrical and thermal design
- Review structural and installation details
- Run an acceptance test
- Compare suppliers and quotations
- Frequently asked questions
- Conclusion
1. Define LED Transparent Screen Quality for the Installation
The best LED transparent screen is the one that meets the site’s visual, physical, and operating requirements. A higher number on one specification does not guarantee a better result. For an LED transparent screen, start with a survey: record glazing dimensions, orientation, tint, reflections, direct-sun hours, background brightness, the nearest and farthest viewer positions, and where power and signal cables can run. Photograph the window by day and after dark from the actual audience positions.
01. Decide what viewers must see
Define the message before selecting pixel pitch. Large logos and short headlines tolerate a coarser grid; detailed product images and small text need more pixels across the content area. An LED transparent screen is often seen against a changing background, so visual contrast can shift by hour. Ask the vendor to play your actual artwork at the proposed native resolution, with transparent black areas rather than a full-coverage sample video.
02. Separate must-have criteria from preferences
Write a short specification that covers minimum legibility at the closest viewing point, required sightline through the glass, operating schedule, service side, noise limits, and any local electrical or building requirements. Express critical requirements as tests. For example, “headline readable from the opposite sidewalk at noon” is more useful than “high brightness.” The numbers in a product sheet still matter, but they should support a practical result.
| Site question | Evidence to collect | Acceptance decision |
|---|---|---|
| How close are viewers? | Measured nearest and typical viewing distances; real artwork | Text and key details remain readable at those positions |
| How bright is the background? | Day and night photos; direct-sun schedule | Content remains visible at the agreed operating brightness |
| What view must remain open? | Marked sightlines and glazing layout | Installed frame, cables, and screen preserve the required view |
| Who services the display? | Access drawing and replacement procedure | Modules and power units can be reached safely |
Do this work before ordering a sample. It prevents a costly mismatch between a technically sound LED transparent screen and its intended window.
2. Test LED Transparent Screen Image Quality in Real Lighting
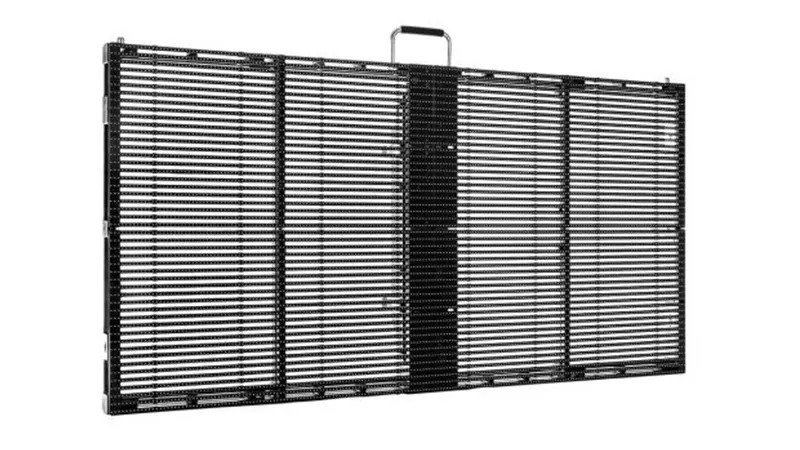
A convincing quality check uses the complete sample assembly, the intended controller settings, and lighting that resembles the site. View the LED transparent screen head-on and from the sides. Compare normal content with diagnostic patterns, and record the settings used. A phone video can reveal flicker, but camera shutter interaction can also create bands that viewers do not see; use it as a clue, not the only test.
01. Brightness, contrast, and dimming
Brightness is usually stated in nits or cd/m². Ask whether the quoted figure is a measured maximum on the complete display, which white pattern was used, and whether it can be sustained under the specified ambient temperature. A daylight-facing storefront may need far more output than an interior atrium, but permanently running at maximum can increase power use and heat. Test a realistic daytime setting and a comfortable nighttime setting. Confirm that automatic or scheduled dimming works and that low-brightness gradients do not break into visible steps.
02. Uniformity and color
Show full white, red, green, blue, 20% gray, dark gray, and a slow gradient across multiple cabinets. Look for dead or stuck pixels, colored patches, abrupt strip boundaries, and differences between modules. View the screen after warm-up as well as immediately after start. Ask whether calibration data are stored per module or cabinet and how a replacement unit will be matched to the installed batch. An attractive demo unit says little about delivered-batch consistency without this process.
03. Motion, refresh, and camera use
Refresh rate, video frame rate, scan method, and grayscale depth describe different things. For a screen filmed by cameras, test with the actual camera frame rate and shutter settings, and examine moving text or fine patterns for banding and moiré. Ask for the driver and controller configuration in writing. Do not assume a single advertised refresh-rate number guarantees camera compatibility. Motion should remain smooth at the LED transparent screen brightness used in operation, not only at full output.
| Test pattern or scene | What to look for | What to ask if it fails |
|---|---|---|
| Full white and RGB | Even output; no dead pixels or tint shifts | Calibration, LED batch, replacement policy |
| Low gray and gradient | Smooth steps; no blotches or flicker | Driver settings and low-brightness performance |
| Grid crossing cabinet joints | Straight lines and consistent spacing | Cabinet tolerances and alignment method |
| Actual campaign artwork | Readable details in day and night conditions | Pitch, content design, and brightness setting |
| Moving content on camera | No objectionable bands or moiré in the intended setup | Scan mode, refresh, camera configuration |
3. Check Transparency, Pixel Pitch, and Viewing Geometry
“Transparent” is not a single optical property. For common strip-style LED transparent screens, open spaces between LED-bearing bars let viewers see through the screen. For an LED transparent screen, a stated transparency percentage may describe the bare module rather than the assembled display. Rails, power boxes, cable routes, mounting steel, and window mullions can all reduce the usable view. Ask for the method used to calculate the figure and inspect an installed-size mock-up from the normal viewing position.
01. Balance pitch with the message
Pixel pitch is the center-to-center distance between pixels, usually in millimeters. A smaller pitch places more pixels in a given area and can improve close-range detail, but may reduce open area or raise cost and power demand. A wider pitch often works for large facade graphics viewed from farther away. Transparent models may have different horizontal and vertical pitches, so request both dimensions and calculate the actual pixel resolution of the proposed screen: width in millimeters divided by horizontal pitch, and height divided by vertical pitch. Round to whole supported pixels and confirm with the supplier’s cabinet map.
02. Judge the view from both sides
Stand where customers will stand and look through the unlit display at the products or interior. Then run typical content. Bright pixels can dominate the scene even when the physical structure is open. Check oblique angles, reflections in the glazing, and the visibility of cable trunks. Do not confuse openness of the LED structure with the glass’s measured visible light transmission; these are different quantities. If daylight retention is critical, have a glazing professional assess the combined installation.
Use physical LED transparent screen samples to compare shortlisted LED transparent screens. The table gives decision logic rather than universal pitch-to-distance rules, because content, pixel arrangement, contrast, and eyesight change the result.
| Project priority | Likely design direction | Verify in a sample |
|---|---|---|
| Close-view product detail | Finer pitch and sufficient native pixels | Smallest required text at nearest viewing distance |
| Long-distance facade graphics | Wider pitch may be sufficient | Logo and motion from the farthest target position |
| Maximum sightline through glass | Higher open area and discreet cabling | Complete installed assembly, not a bare module |
| Sunlit shopfront | Brightness with controlled dimming and contrast-aware art | Live sample against the real daytime background |
4. Inspect Components and Workmanship
External appearance matters, but quality also depends on parts that customers never see. For an LED transparent screen, request an order-specific bill of materials listing LED package, driver IC, power supply, receiving card, control system, cabinet material, connector type, and protection features. The purpose is traceability: a factory should be able to show that the delivered modules match the approved sample or explain an agreed substitution.
01. LEDs, strips, and solder joints
Inspect strips under good light for consistent LED placement, clean solder fillets, secure connectors, and no lifted pads or scorched PCB areas. A visual inspection can reveal obvious defects; it cannot prove long-term reliability by itself. Ask about incoming inspection, assembly checks, aging tests, and the recorded defect policy. The old shortcut of judging solder quality by apparent brightness is unreliable: brightness is controlled by the LED, drive current, calibration, and test conditions.
02. Cabinet seams and serviceable parts
For an LED transparent screen, assemble several cabinets, not only a single panel. A straight test grid should cross every joint without an obvious step, dark line, or color jump. Check fasteners, locating pins, latches, edge protection, and how the system handles thermal movement. Remove and replace one module or power unit during the demonstration. Confirm that a technician can do so from the planned service side without removing glazing or blocking access to unrelated equipment.
03. Batch records and spares
Ask for the module serial or batch scheme, calibration backup procedure, burn-in record, and spare-part list. Agree on the quantity of spare LEDs, strips, modules, and power supplies before shipment. A spare that fits mechanically but has a visibly different color can spoil the wall. Ask the supplier to show a replacement from the same batch, or demonstrate the recalibration workflow if matching stock will be unavailable later.
5. Verify Electrical, Thermal, and Environmental Design
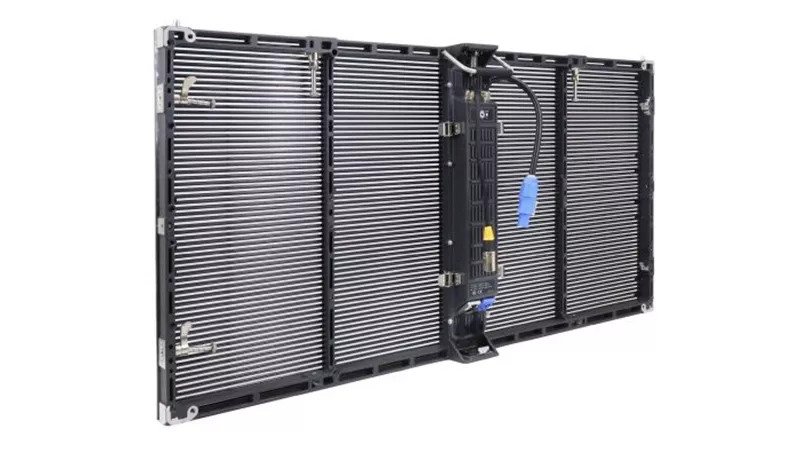
A dependable LED transparent screen must remain stable through its daily operating cycle. For the LED transparent screen, ask for nominal and peak power draw for the exact screen area, not only a per-square-meter marketing figure. Get a single-line power diagram identifying circuits, breakers, earthing, power supplies, and safe shutdown. Have a qualified electrician check local code and capacity. This is especially important when an LED transparent screen is mounted in a glazed facade where access and heat paths differ from an open showroom.
01. Power and data redundancy
Trace the LED transparent screen power and signal path on a sample cabinet. Connectors should be positively retained, labeled, and accessible. Ask what happens when one receiver card, cable, or power supply fails: does a small section go dark, or does a whole chain disappear? Redundant feeds can reduce downtime, but they must be included in the actual configuration and demonstrated by disconnecting a designated test path under supervision. Document network topology and the file needed to restore controller settings.
02. Temperature and ventilation
Heat shortens component life and can affect color consistency. Request the specified ambient operating range and ventilation clearances. Test the assembly after sufficient warm-up at the expected brightness and measure accessible surface and cabinet temperatures with suitable equipment. Do not touch energized LEDs or infer reliability from how warm a lamp bead feels. Compare measurements to the manufacturer’s stated limits and inspect for blocked airflow behind glazing. Plan ventilation with the installer where a sealed window cavity could trap heat.
03. Environmental fit and safety evidence
Indoor models should not be assumed suitable for outdoor weather exposure. If a facade can see rain, dust, condensation, or wash-down, confirm the protection rating of the assembled installation and the direction in which the rating applies. Check cable glands, drain paths, corrosion resistance, and condensation control. Request relevant test reports and certification documents for the destination market, checking the model numbers and scope rather than accepting a generic logo. A building engineer should approve wind loads, suspension points, and any alteration to a curtain wall.
| Document or test | What it proves | What it does not prove alone |
|---|---|---|
| Power schedule for exact area | Expected circuit demand under stated conditions | That existing site wiring is adequate |
| Thermal test at operating brightness | Temperature under tested ambient conditions | Performance in a hotter sealed cavity |
| Protection rating report | Ingress result for the tested assembly | Protection of untested site cable joints |
| Electrical conformity papers | Compliance within listed models and standards | Approval of the final building installation |
| Controller backup and topology | Ability to restore configuration | Automatic recovery without trained staff |
6. Review Structure, Installation, and Maintenance Access
A transparent display is often chosen because the building should still feel open. Heavy frames, visible hanging points, and untidy cabling can undermine that goal. Request a dimensioned LED transparent screen drawing that shows the complete assembly, weight, fixing points, power boxes, controller location, service clearance, and cable routes. Mark the real glazing mullions on the drawing. Ask who is responsible for surveying and certifying the supporting structure.
01. Compare mounting methods in context
Hanging, fixed-frame, and glass-adjacent installations have different service and structural needs. A hanging system must account for rated suspension hardware and building loads; a floor-supported frame needs stable anchorage and may intrude into the storefront; a glass-mounted film or module system needs a glazing compatibility review. Do not use a transparent LED screen’s low apparent weight as a substitute for engineering. Verify where a technician will stand and how a failed component will be accessed safely.
02. Consider content and operations before handover
For the LED transparent screen, ask for the controller model, accepted inputs, scheduling software, content resolution, network requirements, and offline behavior. Define who can change brightness, who keeps configuration backups, and how support is reached across time zones. Test a scheduled playlist, power interruption and restart, and loss of network connection. A visually excellent LED transparent screen is not a good installation if staff cannot operate it or recover it after a common fault.
03. Plan cleaning and replacement
Dust on strips and window glass can reduce the perceived quality of the display. Request the approved cleaning method, isolation procedure, replacement intervals for consumable items if any, and spare storage conditions. Document module removal steps and tools. Agree whether warranty covers only parts or also labor, freight, controller support, and on-site diagnosis. Keep the final as-built drawings and test results with the facility team.
7. Run a Witnessed LED Transparent Screen Acceptance Test
Agree on LED transparent screen acceptance before production. The supplier and buyer should sign the specification, test conditions, allowed defects, and corrective actions. A factory acceptance test confirms the order before shipping; a site acceptance test checks the installed system with real glass, lighting, power, and content. Record photographs, test pattern files, controller settings, meter readings, serial numbers, and open defects. A pass on a small sample cannot replace a full-system test.
01. Factory acceptance
For the LED transparent screen, verify the cabinet count, physical dimensions, pitch, batch identity, and parts list against the approved order. Inspect several randomly selected units, then assemble a representative section with at least one vertical and horizontal joint. Run white, RGB, low-gray, grid, and actual content. Measure brightness and power using the agreed instruments and test conditions. Watch after warm-up, operate dimming, and test a replacement module. Ask for aging and final inspection records, including how defects were repaired and retested.
02. Site acceptance
Check installed dimensions, sightlines, cable concealment, secure mounting, and safe service access. View content at the nearest, typical, and farthest audience points during the site’s challenging lighting period. Confirm scheduled dimming after dark, audio if applicable, network recovery, and breaker labeling. Note any glare or reflection created by the actual glazing. The final acceptance record should distinguish a corrected defect from an outstanding item and assign an owner and deadline.
| Checkpoint | Factory test | Site test | Record |
|---|---|---|---|
| Image uniformity | Patterns across multiple cabinets | Patterns on full installed display | Photos and defect map |
| Brightness and dimming | Meter readings at agreed settings | Day and night viewing | Settings and measurements |
| Resolution and content | Controller map and native file | Actual campaign playlist | Pixel map and files |
| Power and recovery | Safe restart and fault simulation | Restart from site circuits | Test log |
| Service access | Module and PSU replacement demo | Access from planned side | Procedure and spare list |
Ask for a punch list when any item fails. Do not substitute a vague promise to “fix it later” for a documented corrective action and retest.
8. Compare Suppliers and Quotations on the Same Basis
Two transparent LED display quotations may describe different systems even when their screen dimensions and pitch appear identical. Normalize each LED transparent screen offer before comparing price. Confirm active display area versus outer dimensions, cabinet and mounting quantities, controller capacity, cabling, power distribution, spare parts, software, shipping, taxes, installation scope, commissioning, training, and warranty exclusions. Compare measured evidence, not just headline specifications.
Request a project-specific bill of materials, drawings, sample or factory test plan, references for a similar application, and a named support contact. Ask the supplier to state how changes to LEDs, driver ICs, receivers, or power supplies will be approved. A written substitution rule reduces the risk that the production order differs from the sample. For EagerLED-specific process context, see the LED display quality-control overview and the broader transparent LED wall guide.
Evaluate LED transparent screen total cost of ownership. A finer pitch may cost more upfront but be necessary for close-view text. A cheaper cabinet can become expensive if replacement requires dismantling a wall. Higher brightness may help in a sunlit window but add electrical and thermal costs. Ask for projected power use at realistic brightness, not only peak wattage, and make support terms explicit. The strongest offer is one that can pass the agreed acceptance plan with clear responsibility for defects.
When comparing an LED transparent screen with other formats, also consider whether the job truly requires a see-through display. A conventional direct-view indoor LED screen can be more appropriate where window visibility is irrelevant. The transparent LED screen range is a starting point for available formats, but the final selection should follow site tests and engineering review.
9. LED Transparent Screen Quality FAQs
01. How can you verify the quality of LED sign components?
Request an order-specific parts list and compare model numbers with the sample and shipment. Inspect LED placement, soldering, connectors, and cabinet joints, then witness white, RGB, low-gray, grid, warm-up, and replacement tests. Batch and calibration records make the result traceable.
02. Is a brighter LED transparent screen always better?
No. Brightness must suit ambient light and the viewing context. Test content in the brightest expected condition, then confirm comfortable dimming after dark, realistic power demand, and safe operating temperature. Ask how the stated nit value was measured.
03. Does higher transparency guarantee better quality?
No. Higher open area can preserve a view, but it may reduce pixel density or change structural design. Check the complete installed assembly and assess content readability, cable visibility, and the actual sightline together.
04. What is the best pixel pitch for a shop window?
There is no universal answer. Measure the closest viewing distance, screen size, and smallest required text, then play the real content on shortlisted pitches. Confirm both horizontal and vertical pitch because some transparent products use different spacing in each direction.
05. How do I check color consistency across cabinets?
Join multiple cabinets and display full white, primary colors, gray levels, and a slow gradient after warm-up. Look for visible boundaries and ask how replacement modules are calibrated to the existing batch.
06. Can a transparent LED screen be installed outdoors?
Only if the specific system and installed connections are designed for the exposure. Confirm ingress protection, corrosion resistance, drainage, wind loading, electrical compliance, and access with qualified local professionals.
07. What should be included in a factory acceptance test?
Verify parts, dimensions, pixel map, cabinet alignment, defects, brightness, dimming, power, controller recovery, service access, and records. Define measurement conditions and permitted defects in the purchase agreement before production.
08. What warranty questions matter most?
Clarify duration, covered components, spare availability, replacement color matching, remote support, freight, labor, and response times. Request the procedure for documenting a failure and getting a corrected module.
10. Conclusion: Choose Evidence Over Claims
To judge the quality of an LED transparent screen, begin with the installation rather than a catalogue. Test the actual message at real viewing distances in representative light. Check the view through the complete assembly, inspect multiple joined cabinets, verify parts and records, and witness electrical, thermal, and service checks. Put acceptance criteria and support responsibilities in writing before the order.
A supplier who can document the configuration, demonstrate the tests, and explain how the LED transparent screen will be installed and maintained gives you a more dependable basis for a decision than a single impressive specification. Use the checklist in this guide for both the factory sample and the finished site, and keep the test evidence for future maintenance.