

LED display modules are the replaceable building blocks behind a direct-view LED screen. Choosing them well requires more than picking the smallest pixel pitch. The correct module must fit the viewing distance, ambient light, cabinet dimensions, service access, control system, and operating conditions. This guide explains the types of LED display modules, the specifications that matter in a quotation, and a step-by-step selection process for indoor video walls, outdoor advertising, and rental screens.
Quick answer: Start with the closest normal viewing distance and target screen size. Calculate the pixel count from the proposed pitch, check brightness and environmental protection at the installation site, then confirm module-to-cabinet compatibility, power, receiving-card configuration, and a practical spare-parts plan. A module with impressive headline specifications can still be the wrong choice if it cannot be serviced safely or matched later.
Compare available modules: Browse EagerLED’s LED display module catalog for indoor, outdoor, flexible, GOB, and COB options, then use the checks below to shortlist a suitable configuration.
1. What an LED Display Module Includes
An LED display module is an assembly of light-emitting pixels, a printed circuit board, driver electronics, power and data connectors, and a mechanical frame or mounting system. Multiple LED display modules attach to cabinets; the cabinets form the complete display. A module is therefore different from a cabinet, which also houses structure, power supplies, receiving cards, and access hardware. That distinction matters when ordering replacements: a matching pixel pitch alone does not guarantee a module will fit an existing cabinet.
01. From pixels to a finished screen
In a full-color module, each pixel contains red, green, and blue emitters controlled to produce the image. The pixel pitch, stated in millimeters, is the center-to-center distance between adjacent pixels. Smaller pitch gives more pixels in the same area and supports closer viewing. The module’s physical dimensions and pixel matrix determine how it tiles with neighboring modules. For example, a 320 × 160 mm module at a nominal 2.5 mm pitch contains 128 × 64 pixels. This is a calculation, not a substitute for the manufacturer’s actual drawing.
02. Modules, cabinets, and complete systems
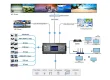
A finished LED wall needs a signal source, processor or sender, receiving cards, power distribution, and a supporting structure as well as the LED display modules. Ask for a diagram of the data path and electrical layout. It should show the number of modules per cabinet, cabinets per data output, power supplies per cabinet, cable routing, and the service direction. EagerLED’s LED display module range provides examples of indoor, outdoor, flexible, GOB, and COB options; the module type should be evaluated as part of the complete system.
2. Types of LED Display Modules and Their Best Uses
LED display modules can be classified in three practical ways: by installation environment, pixel packaging, and mechanical form. The table separates them so buyers can compare like with like. Most modern commercial video walls use full-color RGB LED display modules; single-color and dual-color boards remain useful for basic text and status signs, but they are not equivalent alternatives for video.
| Module type | Typical application | Main advantage | Check before buying |
|---|---|---|---|
| Indoor SMD | Retail, meeting rooms, control rooms | Broad pitch and cabinet options | Glare, viewing distance, touch exposure |
| Outdoor SMD | Billboards, façades, stadiums | High brightness and weather-ready designs | Front/rear IP rating, drainage, sun load |
| GOB-coated SMD | Rental, public-contact, protective surfaces | Added surface protection | Repair method and optical uniformity |
| COB | Fine-pitch indoor walls | Protected light-emitting surface | Repairability, consistency, price |
| Flexible | Curved columns and creative shapes | Follows specified curves | Minimum bend radius and frame design |
| Magnetic front-service | Walls without rear access | Module removal from the front | Retention, safety cable, access to power and cards |
01. Indoor, outdoor, and rental LED display modules
Indoor LED display modules prioritize image detail and comfortable brightness in controlled environments. Outdoor LED display modules must address rain, dust, UV exposure, corrosion, temperature, and direct sunlight at the system level. A front-face IP rating alone does not prove that the rear enclosure, connectors, and installed assembly are suitable for an exposed façade. Rental LED display modules are repeatedly transported and assembled, so fast locks, corner protection, replaceable parts, and camera performance matter as much as pixel pitch. A fixed installation can favor ease of long-term service instead of fast setup.
02. SMD, GOB, and COB explained
SMD places packaged LEDs on the board. GOB adds a protective transparent coating over an assembled LED surface; it describes a treatment, not a separate pixel pitch. COB mounts multiple LED chips on a substrate and encapsulates them. These technologies differ in surface durability, optical behavior, repair process, and price. Neither GOB nor COB automatically guarantees better image quality: compare actual samples at the intended viewing distance, measure color uniformity, and ask how damaged pixels are repaired. For product examples, compare EagerLED’s module categories against your application rather than choosing by acronym.
03. Flexible and magnetic module designs
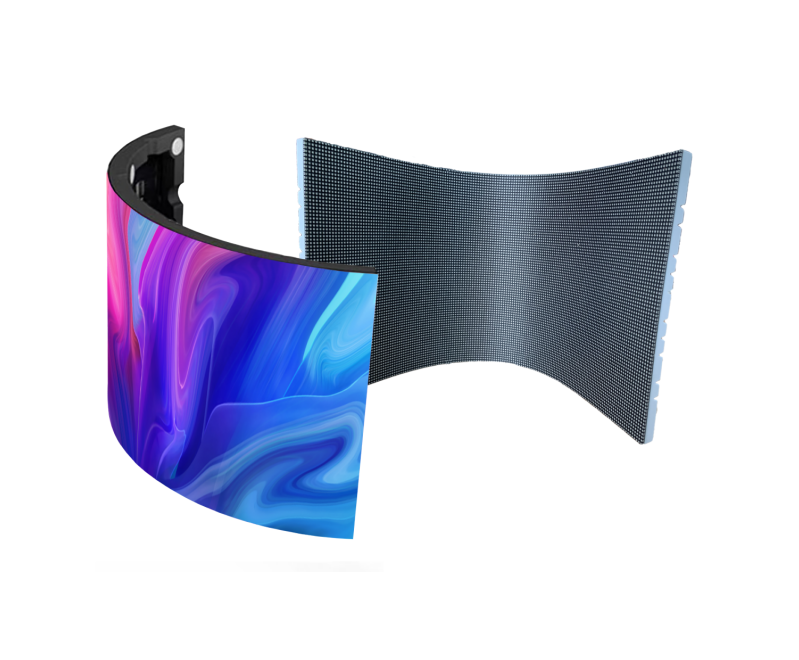
Flexible LED display modules can form curves when the supporting structure and module bend limits allow it. They cannot be bent arbitrarily: the specified radius, fastening method, and thermal path set the geometry. Magnetic LED display modules simplify front access where the wall backs onto a solid surface, but magnets do not replace a properly engineered support and restraint system. The flexible LED display guide gives more design context. Request a dimensioned layout before ordering a curved or unusually shaped display.

3. Specifications That Determine LED Module Performance
A useful LED display module specification connects a number to a real installation decision. The most important fields are pitch, module dimensions and pixel matrix, calibrated brightness, refresh behavior, scan and grayscale performance, viewing angle, power draw, environmental rating, and service access. Ask suppliers to identify the test conditions behind quoted values.
01. Pixel pitch, resolution, and viewing distance
For a rectangular screen, approximate horizontal pixels equal screen width in millimeters divided by pixel pitch; vertical pixels equal height divided by pitch. A 4,800 × 2,700 mm screen at P2.5 is approximately 1,920 × 1,080 pixels. At P3.0 it is about 1,600 × 900 pixels. Final pixel counts must align with the chosen module and cabinet matrix, so round only after a real cabinet layout is drawn. Smaller pitch increases density and often cost, but it does not improve a distant viewer’s experience indefinitely. Judge a sample using the closest routine viewing position and the actual content: small text, faces, graphics, or camera feed.
| Pitch | Pixels per meter, approximately | 4.8 m screen width, approximately | Where to evaluate it |
|---|---|---|---|
| P1.25 | 800 | 3,840 px | Close-view indoor detail |
| P1.875 | 533 | 2,560 px | Meeting or control-room wall |
| P2.5 | 400 | 1,920 px | Indoor commercial video |
| P3.91 | 256 | About 1,228 px; actual cabinet layout governs | Rental or medium-distance viewing |
| P5 | 200 | 960 px | Large-format distant viewing |
These values are geometry calculations. The recommended viewing distance is not a fixed multiple of pitch because eyesight, content, contrast, ambient conditions, and acceptable pixel visibility vary. EagerLED’s panel size guide includes published module formats that can be used to turn a target resolution into a cabinet plan.
02. Brightness, refresh rate, and camera use
Brightness is specified in nits (cd/m²), but measured output may differ after calibration, aging, temperature changes, or automatic dimming. Indoor LED display modules should be comfortable under room lighting; outdoor modules need enough measured brightness for the sun angle and local conditions. Ask whether a quoted value is peak or sustained and whether it was measured on a full-white image. EagerLED’s module range lists indoor and outdoor examples, but the site survey should drive the target.
Refresh rate is the rate at which the LED driving system updates pixels, while video frame rate describes the incoming content. They are different. A high stated refresh rate does not by itself eliminate scan lines on cameras: shutter speed, scan mode, driver IC, dimming method, and processor setup all affect the result. For events or broadcast work, request a filmed test with the camera models and frame rates you expect to use. Compare the image at several brightness levels, not just full power.
03. Power, protection, and service access
Request both maximum and typical power figures in watts per square meter, with the image and brightness assumptions stated. A black image and a full-white test can draw very different power. Use maximum draw to size circuits and distribution; use a realistic content profile when estimating operating cost. For exposed installations, examine the complete assembly’s water and dust protection, thermal management, corrosion resistance, drainage, and wind-load engineering. Confirm whether LED display modules, power supplies, and receiving cards can be replaced from the front, rear, or both. Access space affects the building design before any equipment is shipped.


4. How to Choose LED Display Modules for a Project
The best buying sequence starts with the site rather than a product catalog. It narrows the LED display modules to configurations that can actually deliver the required content and remain maintainable. The steps below also help prevent paying for resolution that viewers cannot use.
01. Define the screen and audience
Record the active display width and height, aspect ratio, minimum and typical viewing distances, daylight exposure, operating hours, and content sources. Identify the smallest text that must remain readable and whether visitors can touch the surface. An advertising façade, close-view control room, and touring stage screen have different constraints even if they share the same physical area. For outdoor sites, include mounting height, sun orientation, local electrical rules, wind load, and permission requirements. For a curved wall, provide a dimensioned radius and the sightlines around it.
02. Calculate a realistic pixel and cabinet layout
Select two or three candidate pitches, calculate their approximate screen resolution, then ask for a module and cabinet drawing for each. The drawing should show exact active dimensions, edge modules, seams, cabinet weights, mounting points, and signal loading. If the selected module dimensions do not divide neatly into the screen dimensions, the finished wall may need a size adjustment. That is preferable to discovering late that a proposed 16:9 screen is not buildable with the quoted parts.
03. Validate samples under real conditions
Compare LED display modules using the same test content, viewing distance, brightness setting, and camera setup. Examine a full-white field for brightness variation; mid-gray for low-level uniformity; skin tones for color; moving patterns for artifacts; and text at the smallest intended size. Check color and brightness at normal operating levels, not only a showroom maximum. Ask to see a replacement module inserted beside older modules. Batch consistency and calibration files are important for avoiding a visible patch on a repaired wall.
| Decision | Information to provide | Evidence to request |
|---|---|---|
| Resolution | Screen dimensions, viewing distance, content | Cabinet drawing and exact pixel matrix |
| Visibility | Indoor lighting or outdoor sun exposure | Calibrated brightness and dimming behavior |
| Camera performance | Camera models, shutter speeds, frame rates | Recorded test at several brightness settings |
| Environmental fit | Rain, dust, temperature, coastal exposure | Assembly rating and installation details |
| Electrical design | Supply voltage, operating hours, cable routes | Maximum/typical watts and circuit plan |
| Serviceability | Front/rear clearance and allowable downtime | Removal demo, spare list, repair turnaround |
| Compatibility | Existing cabinets and controller, if any | Module dimensions, connectors, config files |
For a commercial installation, pair this module-level checklist with EagerLED’s broader commercial LED display buying checklist. The two decisions are related: good LED display modules cannot compensate for a weak structure, unsuitable processor, or an inaccessible wall.

5. Installation and Compatibility: Avoid Expensive Mismatches
Two LED display modules with the same advertised pitch may still be incompatible. Physical size, hole pattern, connector placement, voltage, scan configuration, LED driver, polarity, receiving-card file, and cabinet tolerances can differ. A replacement should be verified against the exact model and production batch whenever possible. Never assume a module can be swapped simply because it is labeled “P2.5.”
01. Confirm electrical and signal interfaces
Ask for the power connector type and orientation, operating voltage, data interface, scan configuration, and receiving-card configuration files. The supplier should provide the controller and firmware version used for testing. During installation, separate data and power cables as specified, secure strain relief, label circuits, and record the cabinet map. An incorrect configuration can look like a defective module because rows, colors, or timing appear wrong.
02. Build for service and future replacement
Front-service LED display modules are useful on walls with no rear aisle, but check whether the power supply and receiving card are equally accessible. Leave space for extraction tools and a safe work position. Store spare modules from the original calibrated batch when practical, along with power supplies, data cables, and configuration backups. Document the serial number and position of each cabinet. EagerLED’s parts and service tutorials show the types of components and replacement tasks that a maintenance plan should cover.

6. Maintain and Troubleshoot LED Display Modules
A maintenance schedule protects image consistency and reduces emergency downtime. It should cover cleaning, environmental seals, ventilation, power, data cables, controller backups, and visual inspection. The right interval depends on dust, weather, operating hours, and access; a fixed universal schedule would be misleading. Record faults by cabinet and module position so recurring issues can be traced to a shared power supply or data path.
01. Routine inspection and safe cleaning
Follow the manufacturer’s approved cleaning method for the particular SMD, GOB, or COB surface. Disconnect power when the service procedure requires it; do not spray liquid into connectors or scrape the pixels. Check for blocked vents, moisture marks, loose fasteners, cable wear, and uneven brightness. For outdoor LED display modules, inspect seals after severe weather and look for water paths around cabinet joints, not only the LED face. Keep a baseline photo and calibration record for comparison.
02. Diagnose by symptom before replacing parts
A dark module may reflect a failed power feed, data connection, receiving-card configuration, or module fault. A whole vertical strip often suggests a shared data or power path. One discolored tile can be a calibration mismatch rather than failed LEDs. Intermittent flicker can result from loose connections, an overloaded supply, or signal instability. Use the manufacturer’s diagnostic sequence and qualified personnel for electrical work; random module swaps can obscure the original fault. After a repair, check uniformity from the normal viewing position and update the cabinet map.
7. Latest LED Display Technology: What Actually Changes a Purchase
Interest in “latest LED display technology” should lead to a testable benefit. Fine-pitch COB and improved SMD packaging can address close viewing and surface protection. GOB coatings can help where LED display modules face frequent contact. Flexible modules make curved architecture possible when designed with a suitable frame. More efficient drivers and calibration tools can improve operation, but a claimed energy saving needs a measured comparison at the same brightness and content. Treat each innovation as a solution to a stated requirement, not a reason to replace an adequate system.
For filmed stages, evaluate flicker and color with the actual camera chain. For outdoor networks, prioritize measured visibility, weather performance, remote monitoring, and a replacement inventory. For a control room, prioritize fine text, low-brightness uniformity, service access, and quiet thermal design. “MicroLED” is used inconsistently in marketing, so request a description of the pixel architecture rather than relying on the label. A newer LED display module is useful only when its optical, mechanical, and service characteristics fit the installation.

8. Cost, Lifetime Value, and Supplier Questions
Price per LED display module is only one part of installed cost. Compare quotes on equal active screen area, pixel count, calibrated brightness, cabinet structure, control hardware, spare parts, freight, installation, and warranty scope. Power use, service labor, access equipment, and downtime can exceed the price difference between modules over the operating life. Avoid a precise payback claim without a site-specific energy tariff, hours, brightness profile, and repair history.
Ask who holds spare LED display modules, for how long, and whether future batches can be color-matched. Request the dead-pixel policy, warranty exclusions, replacement turnaround, and the procedure for keeping configuration files. Clarify whether quoted IP protection applies to the assembled installation, which surfaces are covered, and how water is managed at cable penetrations. For fixed outdoor screens, obtain structural and electrical sign-off from qualified local professionals. A supplier should be able to provide drawings, acceptance criteria, and a commissioning checklist before production starts.
What to ask an LED display module manufacturer
Ask for the exact module model and production batch, a dimensioned drawing, the pixel matrix, and the matching cabinet and controller configuration. Request measured brightness and power figures with test conditions, a sample under the intended lighting, and written details of spare-module availability, warranty coverage, and replacement lead time. For an existing wall, provide photos of the front and back of one module plus its label and configuration file; this lets the manufacturer check compatibility before quoting.
9. Frequently Asked Questions About LED Display Modules
01. What is the difference between an LED display module and a cabinet?
The module is the pixel-bearing replaceable assembly. The cabinet holds one or more modules plus the structural, power, and signal components needed to build a screen. Specifications and replacement orders should identify both.
02. How do I choose the right pixel pitch?
Start with the nearest normal viewer and the smallest content detail that must be legible. Calculate candidate pixel resolutions for the screen size, then compare samples at the actual distance. Smaller pitch is not automatically better value for distant viewers.
03. Are GOB or COB LED display modules always better than SMD?
No. GOB, COB, and SMD describe different construction choices. Compare protection, optical uniformity, repair process, available pitches, price, and real samples for the specific site.
04. Can magnetic LED display modules be used outdoors?
Only if the complete module, cabinet, retention system, connectors, and installed assembly are specified for the site’s weather and wind conditions. Magnetic mounting alone does not establish environmental suitability.
05. Why do camera images show bands when the wall looks normal?
Camera shutter timing can interact with the LED driving and dimming scheme. Test the camera, shutter, frame rate, brightness setting, processor, and module together; a refresh-rate number alone cannot guarantee clean footage.
06. Can I replace a damaged module with another brand?
Sometimes, but identical pitch is insufficient. Match physical dimensions, power and data interfaces, scan configuration, color characteristics, controller files, and mechanical retention. An original spare from the same batch is usually easier to match.
10. Conclusion: Specify the Whole LED Display System
The best LED display modules are the ones that deliver the required image at the real viewing distance, survive the environment, fit a buildable cabinet layout, and can be repaired without excessive downtime. Start with site and content requirements, compare candidate pitches using exact pixel and cabinet drawings, verify measured performance, and keep configuration files and spares. If you are planning an indoor wall, outdoor sign, or rental system, use the EagerLED LED display module catalog and share your dimensions, viewing distance, and operating conditions for a project-specific specification.