

A stage video wall is a modular direct-view LED display assembled as a concert backdrop, side screen, scenic surface, or presentation canvas. A complete stage video wall includes cabinets, processing, power distribution, signal paths, support, content, and a show-day operating plan. The best design starts with audience sightlines and the material to be shown, then selects pixel pitch, cabinet layout, brightness, and camera settings. This guide explains how to plan an LED wall for stage use, compare options, calculate a workable canvas, and request an accurate quotation.
A small ballroom showing detailed slides needs a different wall from a daylight festival stage with distant viewers. Use the decisions below to turn the event brief into a workable first specification. The examples are planning illustrations; confirm the final electrical and structural design with qualified professionals.
1. What a Stage Video Wall Includes
An LED stage screen and a stage video wall describe closely related equipment. “LED stage screen” emphasizes the live-event application; “video wall” describes the assembled display surface. Unlike an LCD wall, a direct-view stage video wall has no visible panel bezels across the picture. Unlike projection, the LEDs emit light, making the canvas useful under stage lighting and in properly specified outdoor conditions. Those advantages do not remove the need for specialist support, power, signal, and calibration.
01. Cabinets, modules and signal chain
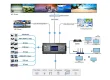
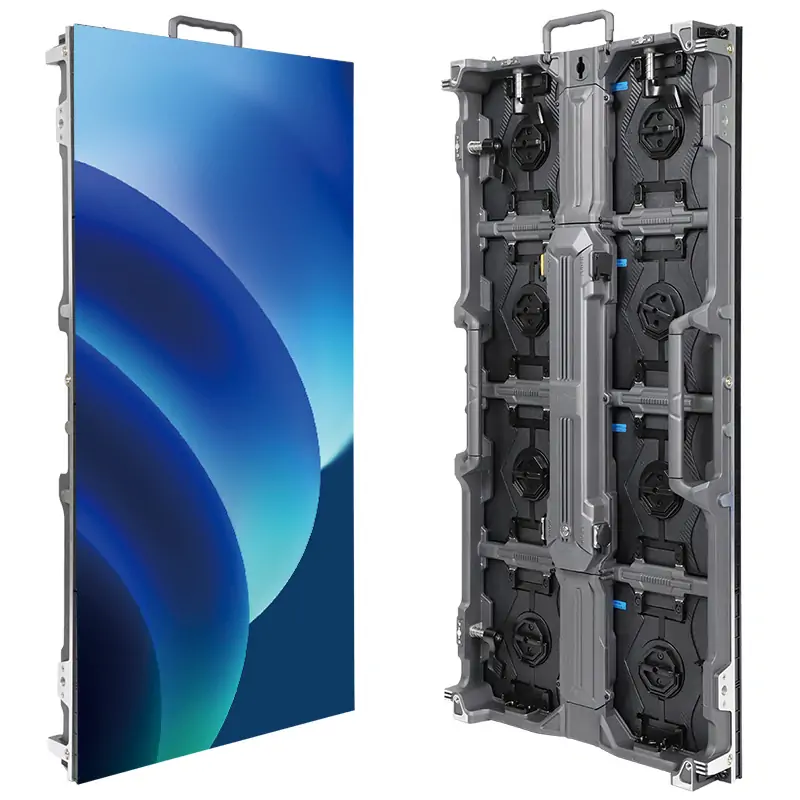
Each rental cabinet holds LED modules, power supplies, receiving electronics, and mechanical connectors. Cabinets join into a grid, while a video processor maps incoming content to the actual pixel canvas. A camera, presentation computer, playback system, or media server feeds the processor through a switcher or other approved path. The stage video wall therefore succeeds or fails as a system: a sharp panel cannot rescue a poor pixel map, unreliable cable run, or weak playback file.
Rental hardware should be assessed for alignment pins, quick locks, edge protection, handles, service access, and compatible cabinet sizes. A stage video wall that tours every week needs repeatable assembly and replaceable parts. A permanently installed wall may put more weight on front maintenance and architectural integration. EagerLED’s EA500C6 rental cabinet, for example, uses a 500 × 500 mm format with optional curved assembly; check the exact model datasheet before specifying a build.
02. Stage screen, side screen and scenic LED
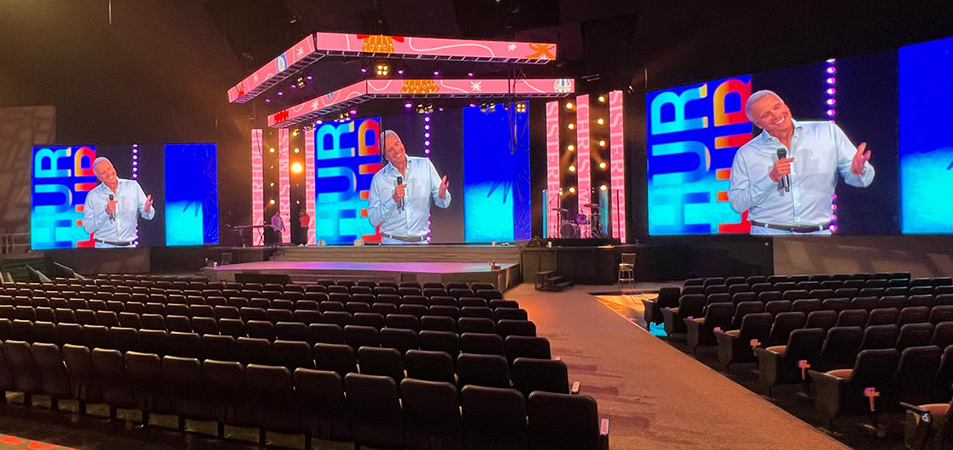
The main stage video wall often carries branding, video scenery, speaker slides, or a live composite. Side screens can show image magnification (IMAG) so viewers farther away can see the performer. Narrow LED strips, columns, or curved surfaces may add scenic depth, but they create extra content canvases and processor outputs. Decide whether every surface should mirror the same feed or show independent content. That decision changes switching, mapping, cabling, rehearsal time, and cost.
For a deeper explanation of rental mechanics and safe setup, see EagerLED’s stage rental LED display setup guide. Use that setup guide for the mechanics, then return to the venue layout and visual result needed for this event.
EA500C6 indoor and outdoor rental LED display demonstration.
2. How to Design a Stage Video Wall Layout
Begin with a venue plan rather than a product catalogue. Mark the stage opening, audience positions, camera positions, ceiling or ground-support limits, lighting fixtures, entrances, and required sightlines. Record the closest viewer and the farthest viewer who must read essential content. For the stage video wall, identify whether the priority is detailed text, live faces, sponsor recognition, ambient scenery, or a mixture.
01. Select a composition that serves the show
A single rectangular stage video wall simplifies content production and uses familiar aspect ratios. A central wall plus two side screens improves distant sightlines at concerts and plenary sessions. A wide, shallow wall can work for panoramic visuals but may shrink readable text. Curved or staggered walls create strong scenic effects; they need cabinet systems approved for those angles and a content team that can handle custom pixel maps. Transparent or mesh LED can suit a layered stage when performers, lighting, or scenery must be visible behind the display, but its brightness, pixel density, and visual transparency are different trade-offs.
| Layout | Good fit | Content and engineering checks |
|---|---|---|
| One main rectangular wall | Conferences, launches, small concerts | Match aspect ratio to slides or video; keep speaker sightlines clear. |
| Main wall plus IMAG side screens | Large rooms and festivals | Plan separate camera feeds, delay, matching color, and independent control. |
| Curved or segmented wall | Immersive scenic sets | Verify approved curve locks, pixel mapping, joins, access, and viewing angles. |
| LED columns or strips | Set extensions and layered scenery | Provide each canvas size and safe cable route to the content team. |
| Outdoor flown or ground-supported wall | Open-air stages | Engineer wind, weather response, power, drainage, and support loads. |
Do not use screen width alone to judge the design. A stage video wall may fill the stage yet still fail if a presenter stands in front of essential copy, audience members see an oblique angle, or lights wash across the content. Draw a safe area for titles and logos, test the view from the rear and side seats, and keep scenic motion behind a speaker controlled enough to preserve attention.
02. Build the content around the native canvas
After choosing the cabinet grid, request its exact native pixel dimensions. Give the content designer both physical size and pixel map, plus the expected frame rate, color pipeline, and safe areas. If the stage video wall is a nonstandard 3:1 canvas, exporting a 16:9 video and stretching it will distort faces and graphics. Use purpose-built content or a clearly approved crop. For multi-surface shows, create a separate map and rehearsal file for each output.
EagerLED’s 56-cabinet P3.91 outdoor rental LED wall project in Hungary shows a real event-scale installation.
3. Choose Stage Video Wall Specifications
Specifications are useful only when tied to the venue, audience, cameras, and operating conditions. Ask suppliers for the exact cabinet variant and measured values instead of accepting a generic “indoor/outdoor” label. A stage video wall for a dark conference room may need modest operating brightness, while a daytime outdoor stage needs much greater output and weather protection. More brightness is not automatically better: excessive output can fatigue viewers and complicate camera exposure.
01. Pixel pitch and viewing distance
Pixel pitch is the center-to-center distance between LED pixels, in millimeters. A smaller pitch puts more pixels in the same area, improving close-viewed detail but usually increasing cost and processor load. For first-pass planning, a P2.6 screen may be evaluated from roughly 2.6 m or farther and a P3.9 screen from roughly 3.9 m or farther. These are rough minimum-distance heuristics, not universal quality thresholds. Fine type, close cameras, viewer acuity, contrast, and panel construction all change the result. Test the stage video wall with actual slides and camera lenses at representative distances.
| Scenario | Pitch to evaluate | Why | Verify on site |
|---|---|---|---|
| Close conference seating and detailed slides | P1.9–P2.6 | More pixels for short distances and text | Smallest required type, camera shot, actual panel sample |
| Mid-size event backdrop | P2.6–P3.9 | Balances detail, area, and budget | Closest seat and native pixel map |
| Large indoor stage with deeper audience | P3.9–P4.8 | Visual content is often viewed farther away | IMAG faces, side-seat angles, sponsor marks |
| Outdoor festival wall | Model-dependent P3.9 or wider | Large viewing distances and brightness needs | Exact weather-rated cabinet, daylight view, camera test |
These ranges are decision prompts, not promises that every manufacturer offers every pitch in the same cabinet. In EagerLED’s EA500C6 range, listed indoor variants run from P1.56 to P3.91 and outdoor variants from P2.6 to P3.91. Confirm the current model sheet for the actual stage video wall quotation. For a fuller discussion of pixel pitch, consult EagerLED’s rental LED display guide.
02. Brightness, contrast and weather protection
Request brightness in cd/m² (nits), its adjustable range, and the calibration conditions used to state it. The EA500C6 product page lists roughly 700–800 cd/m² for indoor variants and 4,500–6,000 cd/m² for outdoor variants, depending on model. A bright stage video wall can still look poor if ambient light hits the face at a bad angle or if dark-scene uniformity is uneven. Inspect real content, not only a saturated demonstration reel.
For outdoor use, ask for the protection rating of both display face and rear assembly, connectors, operating temperature, and the approved weather plan. An IP label describes a tested enclosure condition; it does not certify the temporary structure against wind or lightning. A qualified engineer or rigger should approve support, ballast or suspension, wind limits, and emergency response for the stage video wall at that venue.
03. Refresh, cameras and color
High refresh can reduce scan artifacts in filmed LED, but it does not guarantee a clean camera image. The EA500C6 page lists at least 3,840 Hz refresh for its specified variants. Test the stage video wall with the actual camera frame rate, shutter, lens, angle, distance, focus, and planned brightness. Moiré is a separate interaction between the pixel grid and camera sensor; it may require moving the camera, changing focus or aperture, or choosing a different pitch. Confirm grayscale, color calibration, and any HDR requirements within the full processor workflow.
4. Calculate Stage Video Wall Size, Pixels and Cabinets
Work from the visual brief to an achievable cabinet grid. The screen must be large enough for the farthest essential viewer, but not so large that it obstructs performance, lighting, exits, or rigging. The stage video wall dimensions should also suit the content. Standard video may favor 16:9, while a scenic banner may need a custom ratio and a dedicated export.
01. A worked 8 m × 4 m example
Suppose a production wants an 8 m wide × 4 m high stage video wall using 500 × 500 mm cabinets. The physical grid is 16 cabinets across and 8 high, or 128 cabinets. At a nominal 3.91 mm pitch, width divided by pitch is approximately 8,000 ÷ 3.91 = 2,046 pixels; height is approximately 4,000 ÷ 3.91 = 1,023 pixels. The exact native resolution depends on the chosen module and cabinet map, so use the manufacturer’s integer cabinet resolution for final content and processing. A 3.91 mm cabinet commonly has 128 × 128 pixels in a 500 mm format; 16 × 8 cabinets would then map to 2,048 × 1,024 pixels.
This 2:1 stage video wall is not 16:9. Decide before production whether to create native 2:1 media, letterbox, crop, or reserve areas for graphics. A processor that accepts a 4K signal does not make the physical wall 4K; input capability and native LED pixel count are different. Confirm total pixel load against the actual sending and processing equipment, including extra outputs for side screens.
| Item | Formula or input | 8 m × 4 m illustration |
|---|---|---|
| Cabinets across | Wall width ÷ cabinet width | 8 ÷ 0.5 = 16 |
| Cabinets high | Wall height ÷ cabinet height | 4 ÷ 0.5 = 8 |
| Total cabinets | Across × high | 16 × 8 = 128 |
| Wall area | Width × height | 32 m² |
| Native pixel canvas | Cabinet grid × exact cabinet pixels | 2,048 × 1,024 if each cabinet is 128 × 128 |
| Maximum display load | Area × model-specific maximum W/m² | Request datasheet; do not infer from cabinet count alone |
| Suspended load | Cabinets + hardware + cables + structure | Engineer from actual component weights |
02. Power, structure and service space
Ask for both typical and maximum power demand, the venue voltage, circuit plan, inrush behavior, grounding, protective devices, and cable lengths. Maximum white-screen demand can be very different from average show content. A stage video wall also needs a load calculation that includes cabinets, frames, cables, and any hanging hardware. Preserve rear or front maintenance access according to the chosen cabinet. Do not assume a lightweight cabinet makes an unengineered flown wall safe.
Give the electrical and structural teams the same final cabinet map and revision number. A last-minute change to stage video wall height can change power distribution, support load, pixel canvas, and media exports at once.

5. Plan the Stage Video Wall Production Workflow
Choose an operator and decision owner for every stage of the build. Even a technically capable stage video wall can fail on show day when media, power, rigging, and video teams work from different versions of the plan. Freeze the screen dimensions and pixel map early enough for the content team to deliver rehearsal-ready files. Put all camera, source, and fallback requirements in the production brief.
01. Before load-in
Request a drawing showing cabinet grid, wall edges, support method, service access, power feeds, data chains, processor outputs, and cable paths. Confirm whether the stage video wall uses ground support or flown rigging and who signs off the structure. Ask for a clear demarcation between the supplier’s equipment and the venue’s responsibilities. Prepare a content test pack with realistic slides, logos, skin tones, motion, dark scenes, and live camera feeds. Verify playback resolution, aspect ratio, frame rate, and any color-management settings.
02. At commissioning and rehearsal
Qualified crews should inspect cabinets, locks, pins, supports, cables, and protective devices before energizing the stage video wall. After mapping, run solid colors, grayscale, pixel/line patterns, and representative show media. Look for failed pixels, mismatched modules, bad seams, uneven brightness, and lost signal. Then test every switching cue and any redundant input. Walk the room to check text size and color from the closest, farthest, and side viewing positions. Record the approved processor configuration and keep a backup copy.
If cameras are involved, test the stage video wall at actual show brightness and camera settings. A rehearsed exposure and shutter combination is more reliable than assuming a refresh-rate specification will solve every artifact. For outdoor work, the production plan must include weather monitoring and a named decision maker for wind or lightning procedures. The screen’s IP rating does not replace those decisions.
03. During the show and load-out
Keep spare modules, receiving cards, power supplies, and appropriate cables available in quantities agreed with the supplier. Keep a technician who knows the wall map and approved configuration on call. If a fault occurs, follow the documented replacement and signal-restoration sequence. After the event, inspect and label damaged cabinets before packing; it is easier to trace a stage video wall fault while the layout and port assignments are still known.
The EA500C6 installation walkthrough illustrates cabinet, cable, and configuration steps for that specific product. Follow the current manufacturer instructions and approved project drawings for the exact stage video wall system being used.
P3.9 stage rental display project in Mexico.
6. Compare Stage Video Wall Cost and Procurement Options
A quote expressed only as a price per square meter hides major production costs. For a fair comparison, request an itemized stage video wall proposal that states the exact cabinet model and pitch, quantity, spare allowance, processor capacity, support hardware, power distribution, cable plan, transport, labor, calibration, and on-site technician coverage. Ask which items are excluded. A cheaper display package may cost more after the necessary infrastructure is added.
| Cost category | Ask the supplier to specify | Why it matters |
|---|---|---|
| LED hardware | Exact model, pitch, cabinet count, spare modules, condition | Defines the visible canvas and replacement capacity |
| Control and content | Processor, inputs, outputs, scaling, media server, mapping | Determines whether the design can display every planned feed |
| Support and safety | Ground stack or flown structure, drawings, ballast/rigging approval | Often a major cost and schedule dependency |
| Electrical | Typical/maximum draw, distribution, circuits, cable runs | Prevents venue supply surprises |
| People and logistics | Freight, build/strike crew, technician, rehearsal, insurance | Separates panel price from show-ready cost |
| After-sales or rental terms | Warranty, replacement response, damage terms, storage | Changes total ownership or rental cost |
Renting usually suits one-off events, changing screen sizes, limited storage, or teams that need full technical support. Buying can make sense when the stage video wall is used frequently in repeatable configurations and the owner can fund storage, testing, maintenance, spares, and trained labor. Compare the expected number of events and full-life cost, not a cabinet price alone. EagerLED’s rental LED screen range shows available cabinet families; a project-specific quote should still be built around the venue brief.
A useful supplier request has one page of essentials: venue and city, dates, indoor/outdoor exposure, stage opening, proposed wall width and height, nearest and farthest viewers, content examples, number of cameras, installation method, available electrical service, and target budget. Ask the supplier to return the cabinet drawing, exact native pixel map, maximum load, structural interface, control diagram, and exclusions. That makes stage video wall proposals comparable and exposes unresolved decisions early.
7. Stage Video Wall FAQ
These answers address the questions that most often arise when an event team specifies a stage video wall.
01. What is the difference between a stage video wall and an LED stage screen?
Both commonly refer to modular direct-view LED equipment used at live events. “Stage video wall” emphasizes the assembled visual surface and its content canvas; “LED stage screen” emphasizes the stage application. For purchasing, ask about the complete system rather than the label: cabinets, processor, support, power, weather protection, and service.
02. Which pixel pitch is best for a stage video wall?
Choose from the closest important viewer, the smallest essential content, and the camera workflow. Fine pitch is useful for close seating or detailed slides; larger pitch may be economical for a distant audience. Test a sample with actual material. A rule based only on pitch and distance is a starting point, not a guarantee.
03. Can one stage video wall work indoors and outdoors?
Some cabinet families have separate indoor and outdoor variants, but the same model name does not prove interchangeability. Check the exact variant’s brightness, front and rear IP ratings, connector protection, temperature range, and structural/weather plan. Never assume an indoor cabinet is suitable for rain exposure.
04. How many cabinets are needed for an 8 m × 4 m wall?
With 500 × 500 mm cabinets, 16 fit across and 8 fit vertically, for 128 cabinets. Add an agreed spare allowance. The final count changes with cabinet size, scenic gaps, curved geometry, and the approved support system.
05. Is a 3,840 Hz stage video wall camera safe?
It is a useful professional specification, but no refresh number alone guarantees an artifact-free picture. Test the actual cameras and shutter settings for scan lines and moiré at show brightness. Pitch, scan design, viewing angle, focus, and processor settings also matter.
06. What should be delivered to the content team?
Provide the final native pixel map, physical dimensions, aspect ratio, safe areas, output assignments, frame rate, color workflow, and sample processor settings. For a stage video wall with side screens or LED columns, provide a separate map for each surface and agree whether they mirror or show independent content.
07. Is it better to rent or buy a stage video wall?
Rent when events are infrequent, sizes vary, or an operator and setup crew are needed. Buy when utilization is high and the organization can store, inspect, maintain, transport, and operate the equipment. Include processor, structure, spares, power, freight, and labor in either comparison.
8. Final Stage Video Wall Planning Checklist
The strongest stage video wall design comes from a clear visual job: who must see what, from where, under which lighting and weather conditions? Lock the layout and native pixels before content production. Select pitch through viewing tests, match brightness and protection to the venue, test the cameras, and engineer the support and power system from exact component data. Keep a commissioned configuration and an agreed fault-response plan for the show.
For an actionable next step, send EagerLED your venue drawing, proposed stage video wall dimensions, viewing distances, content type, camera count, indoor/outdoor conditions, support method, date, and delivery city. Request an itemized configuration and pixel map through the contact team. This allows a stage video wall recommendation to be checked against the event rather than inferred from a generic specification list.