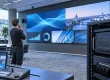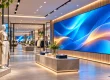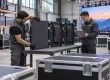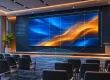


Quick answer: A rental LED display looks effective when the screen, content, and venue are designed together. Start with the closest viewer and the information that must be readable. Confirm the cabinet grid and native pixel canvas before designing assets. Set brightness for the actual light level, test color consistency across cabinets, and rehearse the content with the same cameras, processor, and playback system that will be used at the event. A bigger wall or finer pixel pitch alone cannot rescue tiny text, unsuitable footage, or blocked sightlines.
This guide explains how to create engaging content for large LED screen rentals at concerts, conferences, exhibitions, weddings, and sports events. It covers both the physical rental LED display and the visual workflow: what to specify, what to deliver to the operator, and what to check before doors open. EagerLED manufactures rental LED cabinets; an event rental package and on-site production services should be confirmed separately with the local provider.
1. What Makes a Rental LED Display Visually Effective?
A rental LED display is a modular, direct-view video wall assembled from repeat-use cabinets. LED modules form the image; receiving electronics and a video processor distribute it across the complete wall. Rental cabinets are designed for transport, quick locking, alignment, and service access. The assembled screen may be a stage backdrop, side screen, exhibition wall, or creative shape.
Visual impact has three tests. Can the audience see it? Position, brightness, viewing angle, and size matter. Can the audience understand it? Type size, contrast, pacing, and content hierarchy matter. Does it survive live production? Consistent color, reliable signals, safe support, and camera compatibility matter. Treat these as separate requirements in the event brief. A rental LED display with impressive catalog specifications can still fail the second or third test.
The core planning inputs are the nearest and farthest viewers, usable wall dimensions, indoor or outdoor exposure, ambient light, source formats, live-camera needs, and installation method. Ask who owns each decision: event producer, content designer, LED technician, video engineer, camera crew, and venue rigger. The easiest time to correct a mismatched canvas or unreadable sponsor logo is before final artwork is rendered.
2. Plan the Rental LED Display Around the Audience
01. Map sightlines before choosing wall size
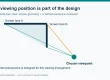
Draw the stage and mark the front row, rear row, side seats, presenter positions, columns, and camera platforms. A large rental LED display placed too low may be hidden behind standing guests. A wall too wide for the stage can put essential text at the edge of a viewer’s field of vision. For a live camera feed, consider side screens that let distant viewers see a face without looking away from the performance.
Do not assume every event needs a single giant canvas. A conference often benefits from a restrained backdrop plus one clearly readable presentation region. A concert may use a wide scenic wall and separate image magnification screens. An exhibition booth may need a closer-view rental LED display with simple messages that can be understood in seconds by visitors walking past.
02. Translate the event brief into a visual plan
| Use case | What viewers need | Content direction | Check on site |
|---|---|---|---|
| Conference | Readable names, charts, and key points | One idea per slide; high-contrast text; restrained motion | Read the smallest essential label from the rear seat |
| Concert | Performance energy and recognizable faces | Bold motion, live camera feed, clear transitions | Stage lighting, camera exposure, and cue timing |
| Trade show | Brand and product message at a glance | Short loops, large product visuals, captions without audio | Side-angle viewing and booth traffic path |
| Outdoor event | Legible picture under changing daylight | Strong contrast and a daylight/night content plan | Operating brightness, weather plan, and viewing position |
Use the table as a briefing tool, not a universal specification. A rental LED display for a dim ballroom and one facing afternoon sun have very different brightness and weather requirements even if they are the same physical size.

3. Choose Pixel Pitch, Screen Size, and Native Resolution
01. Select pitch for real content and the closest viewer
Pixel pitch is the center-to-center spacing between LEDs, expressed in millimeters. A smaller number places more pixels in a given area and can make detail smoother at short distances. It also tends to increase the price and processing load. For a rental LED display, shortlist pitch only after measuring where people will stand or sit and identifying the smallest information they must read. Compare your actual slides, logos, faces, and gradients on candidate panels at that distance.
Do not promise a fixed minimum viewing distance from pitch alone. Visual acuity, contrast, content size, and the individual panel all change the result. EagerLED’s pixel-pitch guide explains the underlying trade-off. Its broader rental LED display guide covers selection and cost; this article concentrates on how to turn the chosen wall into effective event visuals.
02. Calculate the actual pixel canvas
Screen dimensions and video resolution are different measurements. A 6 m wide rental LED display at a nominal 3.91 mm pitch has roughly 6,000 ÷ 3.91, or 1,535 pixels across. For the exact map, use the manufacturer’s cabinet pixel count multiplied by the number of cabinets; nominal pitch names may be rounded. For example, twelve 500 mm cabinets across and seven high, each 128 × 128 pixels, create a 6 m × 3.5 m wall with a native canvas of 1,536 × 896 pixels. Its physical aspect ratio is 12:7. Sending a 1,920 × 1,080 file does not turn it into a Full HD wall.
| Item | Example value | What the designer should do |
|---|---|---|
| Cabinet grid | 12 across × 7 high | Confirm the final build before exporting artwork |
| Cabinet pixel map | 128 × 128 pixels | Get the exact model specification from the operator |
| Wall canvas | 1,536 × 896 pixels | Create a master layout at this native ratio |
| 16:9 source | 1,920 × 1,080 pixels | Agree on crop, letterbox, or designed side areas |
| Safe content area | Project-specific | Keep logos and essential text clear of edges and obstructions |
Supply the content team with a pixel map, cabinet grid, playback frame rate, input format, and any masked areas. On irregular or curved rental LED display builds, supply a template for every surface and test the seams with real graphics. Avoid placing fine text across a corner or cabinet transition.
4. Set Brightness, Contrast, and Color for the Venue
01. Tune operating brightness, not just maximum brightness
Brightness is usually quoted in nits, equivalent to candela per square meter. A maximum-brightness figure does not tell you how a rental LED display will look throughout an event. Indoor walls often need to be dimmed so faces and stage lighting remain balanced. Outdoor screens need enough output for the expected sun exposure, with a separate setting for evening. Specify who can adjust the wall during the show and how those changes will be coordinated with cameras.
A display pushed too bright can wash out pale content, distract from a presenter, and expose color differences between cabinets. Excessive dimming can crush shadow detail and make sponsor marks disappear. Test white, near-black, skin tones, saturated brand colors, and gray gradients at the planned operating level. The useful question is whether the audience can read and recognize the content, not whether the rental LED display can reach its catalog maximum.
02. Keep color consistent across cabinets
Repeated transport and mixed inventory can reveal mismatched modules, calibration profiles, or aging. Request cabinets from a compatible batch where possible and confirm that calibration data is loaded for the built wall. During rehearsal, show full-field white and gray as well as the final media. Look for a bright rectangle, visible seam, tint shift, dead pixel cluster, or uneven low-gray response. Photograph defects and ask the technician to correct them before content rehearsal proceeds.
Brand colors require a practical review: compare the physical rental LED display to the approved reference under event lighting. An RGB value in a file is not a guarantee of the same color on a camera feed or in a dim venue. Keep a simple color sign-off process that involves the content lead and video engineer. Use rental-grade cabinet options as a starting point, then verify the selected model’s brightness, service method, and outdoor suitability on its current specification sheet.

5. How to Create Engaging Content for Large LED Screen Rentals
Use this five-step workflow before exporting event visuals:
- Set the purpose of each scene. Decide whether it must identify a speaker, explain a product, carry a live camera feed, or direct visitors.
- Design to the confirmed pixel map. Get the cabinet grid, native canvas, aspect ratio, and any masked areas from the video operator before building artwork.
- Make the key message legible. Use one clear visual hierarchy, strong contrast, and text that can be read from the farthest important seat.
- Match motion to the moment. Give viewers time to read a finished frame; keep presentation backdrops quieter than concert transitions.
- Test the final files on the real system. Rehearse at operating brightness with the playback processor and planned cameras, then retain versioned masters and fallback stills.
01. Build a message hierarchy that works at a glance
Start each scene with one job: announce a speaker, show a live performer, explain a product, identify a sponsor, or direct guests. Give the most important element the most space and contrast. On a rental LED display, a short headline and one strong visual usually communicate faster than a dense paragraph. If the audience must read a complex schedule or data table, use a dedicated information screen, a QR-linked document, or a shorter on-screen summary.
Design for the farthest viewer as well as the nearest. View the artwork at a reduced scale and then test it on the actual rental LED display. Small serif type, thin strokes, low-contrast color pairs, and intricate patterns may look elegant on a laptop but disappear on a large wall. Captions matter for trade-show loops and event zones where sound is unavailable. Use meaningful labels for charts rather than relying on a tiny legend.
02. Match motion and pacing to the event
Movement attracts attention, but continuous fast motion can compete with a presenter or obscure a call to action. Use motion to direct the eye, then hold the finished frame long enough to read. A product booth can use a short loop that shows the product, benefit, and brand in sequence. A conference backdrop should remain calmer during spoken material. Concert visuals can be more kinetic, but should still support lighting cues and camera cuts.
Choose footage with a clear subject and framing that fits the native canvas. If the rental LED display is unusually wide, design a panoramic composition or coordinated side zones; avoid stretching a standard video. Keep a copy of still fallback frames for cue gaps. Check transitions between light and dark scenes to prevent uncomfortable jumps in perceived brightness.
03. Deliver a clean file and playback package
Ask the video operator for the accepted codec, container, frame rate, color workflow, alpha support, audio routing, and file naming rules. Export one tested master for each canvas. Include a content manifest with file name, duration, intended cue, version, and approval owner. Keep the approved files in a clearly labeled folder and avoid last-minute replacements with similar names. For a multi-screen rental LED display setup, specify which surface receives each asset.
Test the playback chain with the actual processor. A high-resolution file can still look soft if it is scaled twice, sent at the wrong aspect ratio, or compressed too heavily. Confirm that presentation laptops, media servers, backup sources, and source switching follow the show flow. The wall should show deliberate content rather than a desktop, login screen, or blank input when cues change.
6. Make the Rental LED Display Work on Camera
01. Test scan artifacts and moiré with the real cameras
Refresh rate describes how the LED hardware updates; it is not the same as the frame rate of the video file. A high refresh specification can help, but it cannot by itself guarantee clean footage. Camera shutter timing, scan behavior, lens choice, focus, distance, and processor settings all matter. Moiré appears when the camera sensor pattern interacts with the LED pixel grid. Rolling bands can appear when camera exposure and display timing conflict.
During technical rehearsal, point each broadcast, PTZ, and social-media camera at the rental LED display from the positions and focal lengths actually planned. Test white, gray, dark scenes, motion, live feed, and a presenter in front of the wall. If artifacts appear, let the video engineer and camera crew adjust shutter and processor settings together; changes that fix one camera may affect another. Camera timing and LED timing must be checked together during the rehearsal.
02. Protect the speaker and the picture
A bright rental LED display behind a person can make faces look dark when the camera exposes for the wall. Use a controlled wall brightness, appropriate front light, and a content design with enough quiet space behind the presenter. Avoid high-contrast lines immediately behind hair and shoulders. Check skin tone and brand color in the recorded feed, not only with the naked eye. For image magnification, account for processing latency so lip movement and on-stage sound do not feel disconnected.
7. Build, Test, and Rehearse the Complete System
01. Confirm support, power, signal, and service access
The rental LED display is part of a temporary structure. Agree on the approved hanging or ground-support method, cabinet and rigging weights, venue load limits, cable paths, power distribution, weather response, and emergency access. Qualified local professionals should approve structural and electrical work. For an outdoor wall, confirm the selected cabinets’ actual ingress-protection rating and the provider’s plan for wind, rain, and shutdown; an outdoor label is not a complete weather plan.
Build one representative section before committing to the full configuration. Check cabinet locks, alignment, orientation, signal mapping, and front or rear service clearance. Label data lines and power feeds. Keep compatible spare modules, receiving cards, power supplies, and cables within reach according to the system’s service plan. A rental LED display that cannot be repaired quickly can interrupt both the visual show and the event schedule.
02. Run a visible-content acceptance test
After the wall is mapped, inspect it with solid colors, gradients, fine lines, a moving pattern, and approved event content. Check from the front row, rear row, side seats, and each camera position. Then rehearse source changes, blackouts, emergency content, and backup playback. Log the owner of every issue and retest after correction. The event producer should sign off on legibility and cues; the technical team should sign off on display behavior and safe operation.
8. Match Rental LED Display Layouts to Event Goals
Corporate event: Reserve the clearest region for speaker names and key ideas. Use graphics that support the presenter rather than constant movement. If the room is wide, add side screens for live close-ups. Concert: Coordinate the main scenic wall with image magnification, lighting, and music cues. Give cameras a repeatable content and brightness state. Trade show: Make the core message visible in a short glance from the aisle, then provide a deeper demo for people who stop.
Outdoor screening: Plan daylight and evening settings and verify the weather plan. Wedding or celebration: Favor large photographs, legible names, and a rehearsal of transitions; avoid tiny collages that become unreadable at a distance. Sports event: Prioritize scores, timing, and live action; keep sponsor messages from covering essential information. Each use changes how the rental LED display should be positioned and what content deserves the largest pixels.
The existing LED poster image below illustrates a smaller companion format. A poster can handle wayfinding or a close-range schedule while the main rental LED display carries the stage image. These formats serve different viewing distances and should have separate content files.

9. Compare Rental LED Display Quotes on Total Scope
Separate hardware purchase from local event rental service. EagerLED supplies display equipment; local rental availability, transport, installation, operators, and insurance depend on the project and provider. Ask each bidder to quote the same wall size, pixel pitch, cabinet model, processing, support method, cables, crew, rehearsal time, spares, and strike schedule. A low cabinet-only figure is not comparable with a complete operated system.
Request a written pixel map and power/load figures for the proposed build. Ask who pays for extra rigging, generator capacity, weather cover, overtime, and replacement parts. If the event will be filmed, include camera tests in the scope. If the same organization uses a rental LED display frequently, compare the total cost of ownership with hiring, including storage, service stock, technicians, and depreciation. See EagerLED’s stage rental setup guide for safety and spare-parts planning.
10. Diagnose Common Visual Problems Before the Audience Arrives
| Visible problem | Likely check | Practical response |
|---|---|---|
| Text is unreadable | View from the rear; inspect font size and contrast | Enlarge essential words, simplify slides, or add a closer information screen |
| Picture looks stretched | Compare source ratio with native wall canvas | Re-export to the mapped ratio or choose a deliberate crop/side-zone layout |
| Cabinet looks different | Inspect white, gray, and calibration profiles | Correct mapping/calibration or replace the mismatched cabinet |
| Bands appear on camera | Test camera shutter and display timing | Coordinate camera and processor adjustments during rehearsal |
| Dark detail disappears | Review operating brightness and grayscale | Rebalance content and wall setting at the intended light level |
| Feed drops out | Trace source, processor, data path, and power | Switch to tested backup content, then isolate the failing component |
Do not hide a defect with an unrelated content change. Establish whether the issue is in the media, source, processing, cabinet, or environment. Record the remedy so the next rental LED display build does not repeat it.
11. Rental LED Display FAQ
01. How do you make a rental LED display more engaging?
Give each scene one clear purpose, use large high-contrast elements, and fit the artwork to the wall’s exact pixel map. Match motion to the event, then test the result from real audience positions. Engagement depends on comprehension and timing as much as brightness.
02. What pixel pitch should I choose for an event LED screen?
Measure the closest meaningful viewer and test your smallest essential text and imagery on candidate panels. A finer pitch increases pixel density, but there is no universal distance threshold that guarantees readability. Compare pitch together with content, screen size, and cost.
03. Is a high refresh rate enough for a filmed event?
No. The rental LED display, processor, camera shutter, frame rate, lens, and viewing geometry interact. Test every production camera with the planned content and settings. If bands or moiré appear, have the camera and video teams adjust the system together.
04. What files should a content designer deliver?
Ask the operator for the native canvas, accepted codec and container, frame rate, color workflow, source interface, and safe areas. Deliver named and versioned masters for each display surface, plus still fallback frames and a cue manifest. Rehearse those exact files on the rental LED display.
05. Can an indoor rental LED display be used outdoors?
Do not assume so. Confirm the exact cabinet’s weather rating, brightness, support method, power plan, and local weather procedure with the provider. Even an outdoor-rated display requires a site-specific plan for wind, rain, cable protection, and safe shutdown.
06. Does buying rental LED cabinets include event rental service?
Usually these are separate arrangements. A manufacturer may sell cabinets and related equipment, while a local AV provider supplies transport, rigging, setup, operation, insurance, and strike. Request a line-item scope so every quotation covers the same event requirements.
12. Conclusion: Design the Visual Experience as One System
The strongest rental LED display result comes from a joined plan for audience distance, cabinet grid, native resolution, content, brightness, cameras, and live operation. Begin with what viewers must understand, then choose the wall and production workflow that make it clear. Confirm the technical brief early, test real files in the venue, and rehearse every cue before the audience arrives. That approach gives a rental LED display visual impact that survives both the room and the camera.
Project handoff: Send the venue dimensions, nearest viewer distance, event schedule, indoor or outdoor conditions, installation method, content types, camera requirements, and destination to your display provider. For available rental-grade cabinets, review EagerLED’s rental LED display range and request a model-specific specification and system quote.